DIY Accent Wall Projects You Can Actually Do (Even on a Budget)
An accent wall can instantly change the mood of a room. It’s bold, personal, and a lot easier to DIY than most people think.
You don’t need a ton of tools or money, just a little time and creativity.
This list is packed with projects anyone can pull off. From paint tricks to renter-friendly hacks, these accent wall ideas are simple, affordable, and seriously stylish.
Paint-Based Accent Walls You Can Actually Do
Paint is the simplest and most affordable way to create a bold statement. These ideas use just a brush, roller, painter’s tape, and some creativity to totally refresh a room, no special skills required.
1. Half-Dipped Wall with a Soft Color Block
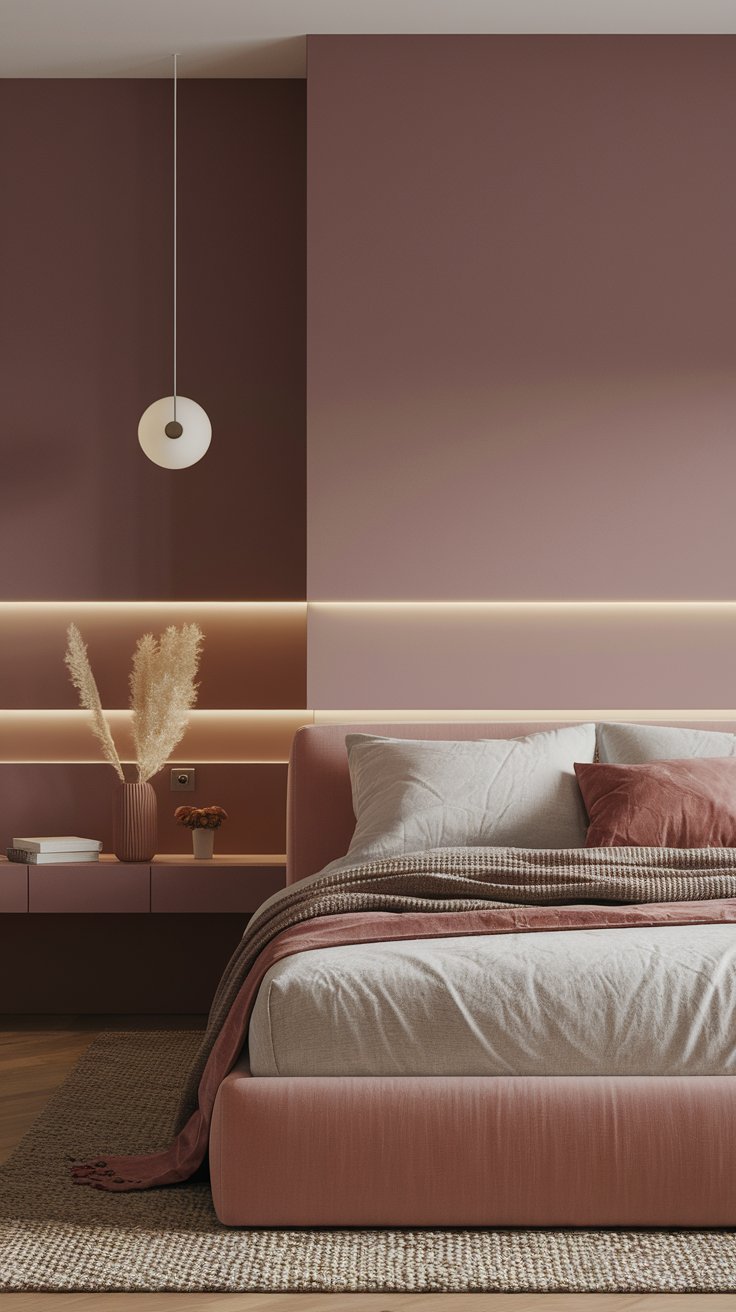
This effect gives your room a modern, artsy feel without overwhelming the space. Painting only the bottom half (or two-thirds) of your wall creates a clean division that instantly adds visual interest.
How to Do It:
- Choose a soft or muted color (like sage green, dusty pink, or pale blue).
- Measure and tape off the section you want to paint.
- Use a roller for smooth coverage and peel the tape while the paint is still damp for clean lines.
- Optional: Add a narrow trim or wood strip where the two colors meet.
Why It Works:
It makes ceilings feel taller and adds warmth, perfect for bedrooms, offices, or reading nooks.
2. DIY Painted Arch or Headboard Shape
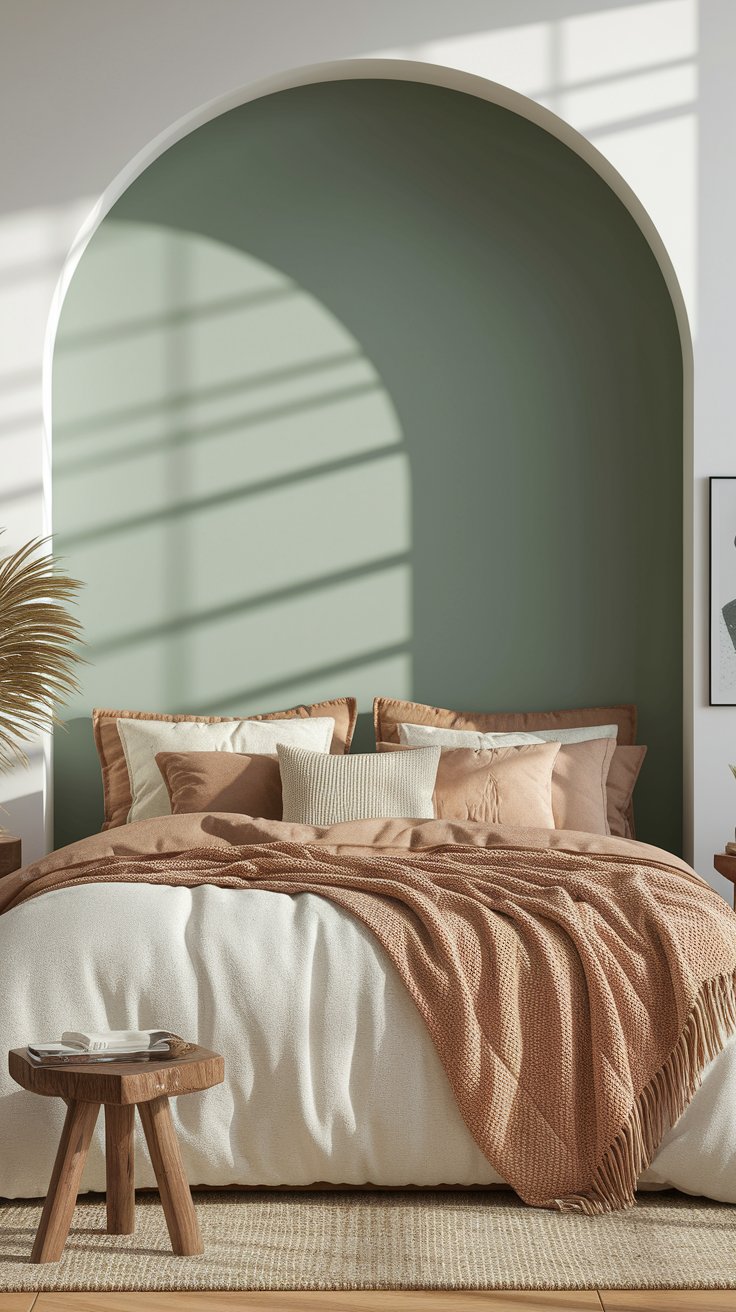
Instead of buying a bulky headboard or wall art, paint a soft arch right behind your bed, mirror, or dresser. This instantly frames the space and gives it a stylish focal point.
How to Do It:
- Trace your arch using a string and pencil (like a DIY compass).
- Fill it in with a bold or calming color using a brush and small roller.
- Touch up the edges with a small angled brush for smooth curves.
Why It Works:
It’s playful and on-trend, but still easy to remove or paint over when you’re ready for something new.
3. Geometric Wall Using Painter’s Tape
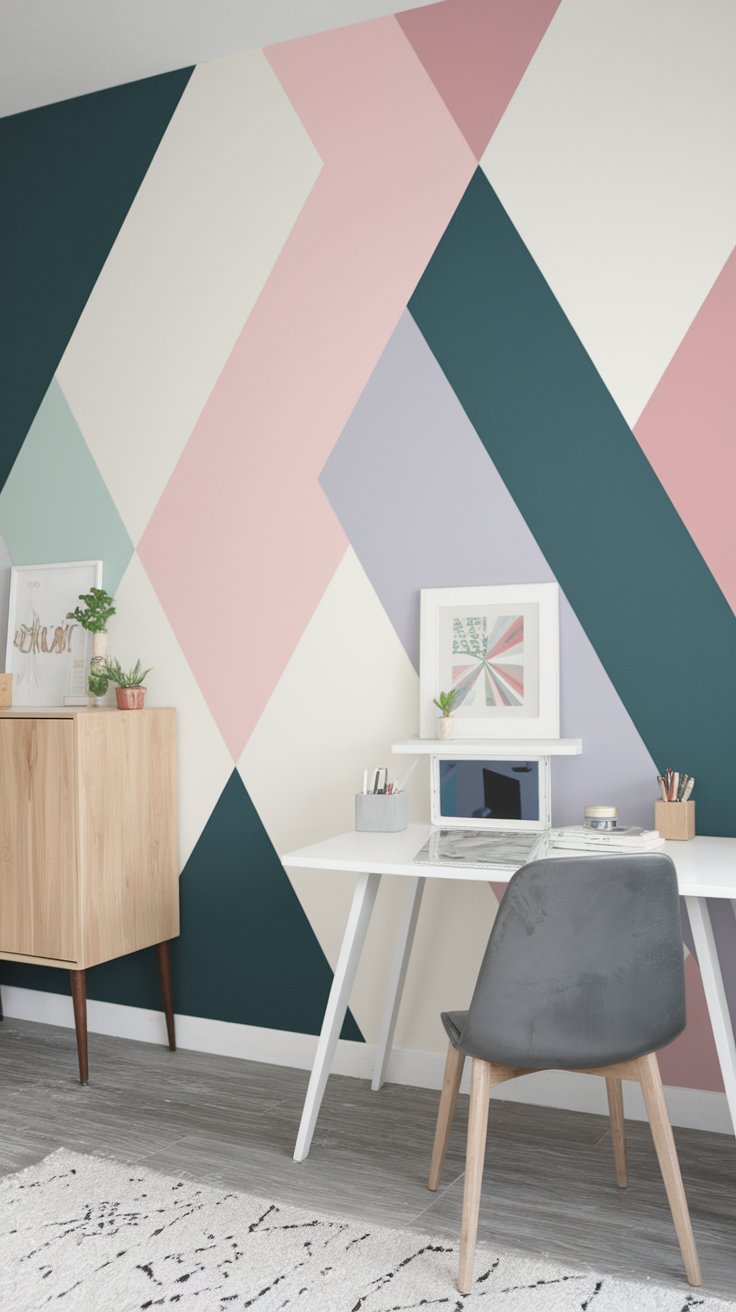
Painter’s tape can turn any wall into a piece of art. Crisscross lines at random angles or create triangles, diamonds, or grids. Then paint each section a different tone within your palette.
How to Do It:
- Use painter’s tape to create your design on the wall.
- Press tape edges down firmly to avoid bleeding.
- Paint each shape with a small brush or roller.
- Peel the tape while the paint is still tacky for crisp lines.
Why It Works:
This project turns any plain wall into a colorful, personalized backdrop, and it’s totally unique every time.
4. Ombre Fade Wall with a Roller
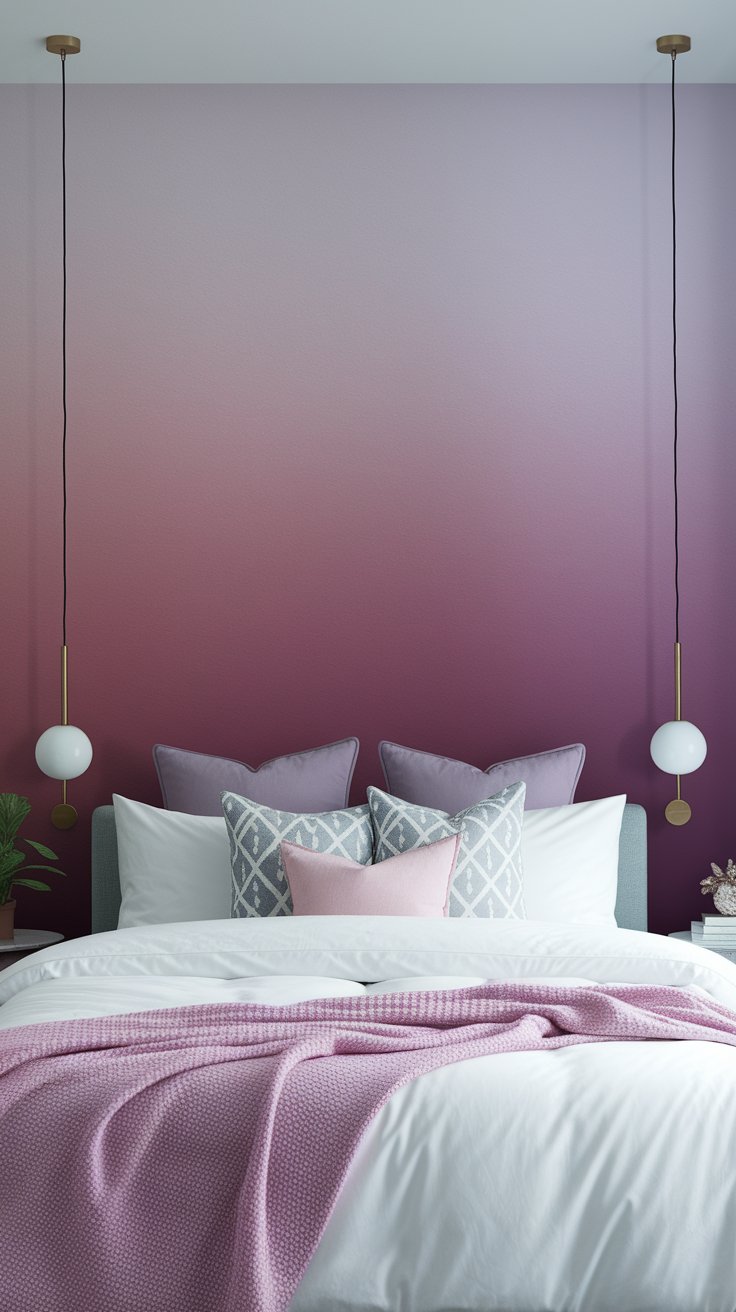
Create a dreamy, gradient transition from light to dark with just three paint shades and a blending technique. This is great behind a bed, in a hallway, or even on a closet wall.
How to Do It:
- Pick three similar shades (light, mid, dark) in the same color family.
- Paint horizontal sections from top to bottom.
- Before the paint dries, blend the edges where the colors meet using a dry brush or roller.
- Repeat until the transitions look smooth.
Why It Works:
The soft fade adds movement and mood, especially in bedrooms or meditation spaces.
5. Chalkboard or Writable Wall
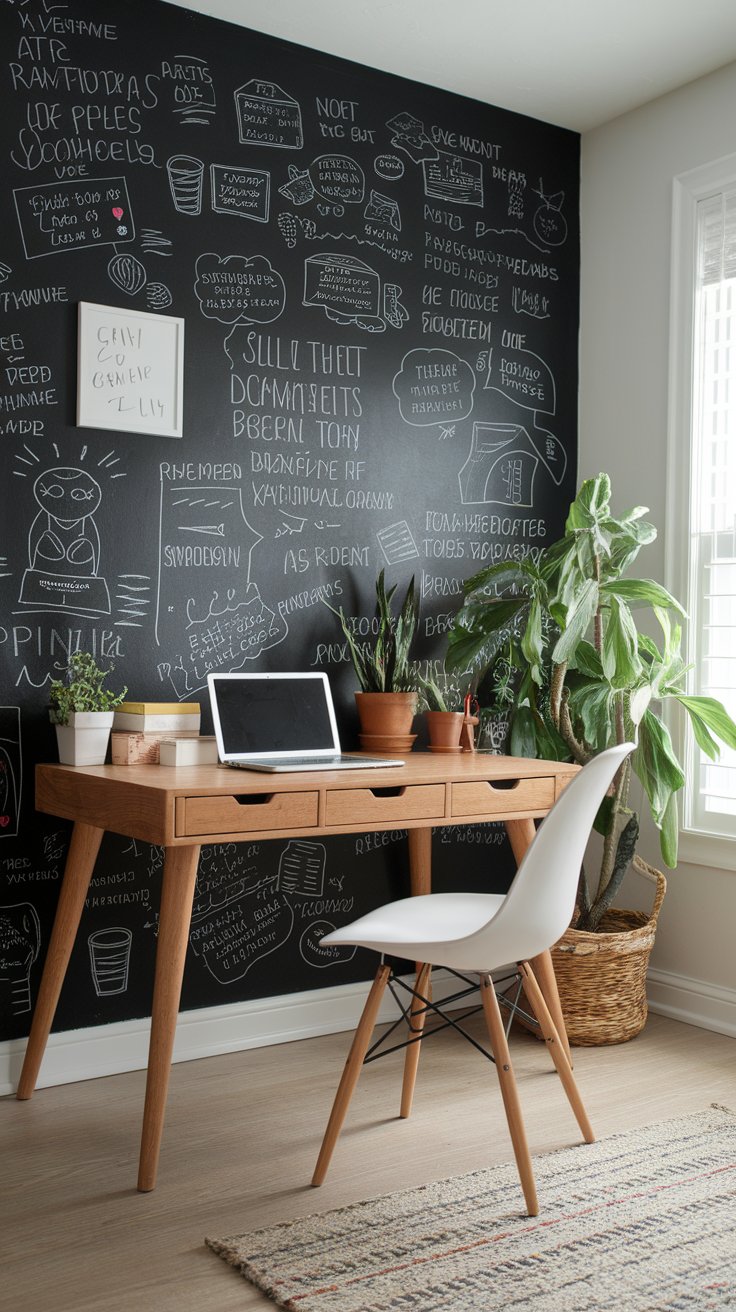
Paint one wall with chalkboard paint or dry-erase paint to create a spot for to-do lists, doodles, or inspirational quotes. It’s both functional and fun, especially in kitchens, offices, or entryways.
How to Do It:
- Clean and sand the surface.
- Apply chalkboard or whiteboard paint in even coats.
- Let it cure fully before writing on it.
- Frame the edges with wood trim or washi tape for a finished look.
Why It Works:
It turns your wall into an interactive space, perfect for creatives, students, or anyone who loves visual reminders.
Texture & Pattern Accent Walls on a Budget
These projects bring depth and character to your room using low-cost materials like plywood strips, joint compound, and peel-and-stick panels. They’re perfect if you want something tactile, cozy, and beyond basic paint.
6. Faux Shiplap Using Plywood Strips
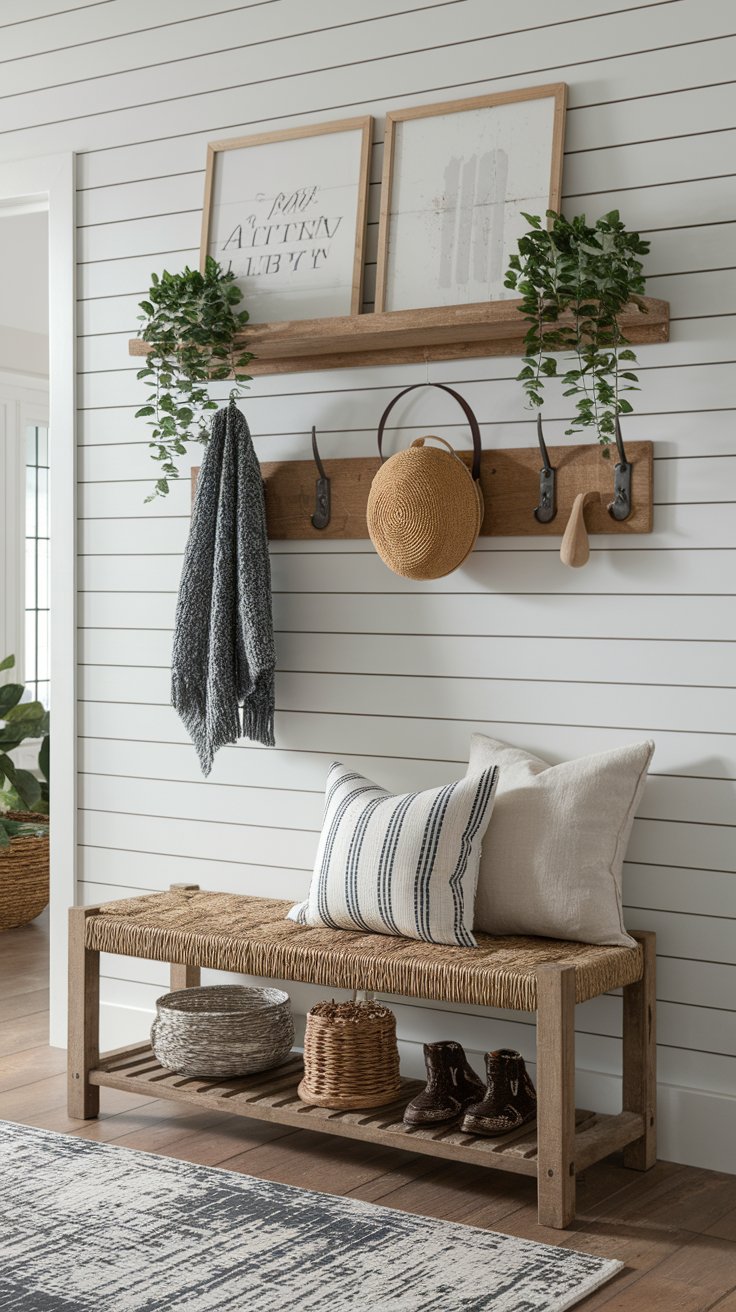
You don’t need real hardwood to get that popular shiplap look. Thin plywood (or even MDF strips) spaced evenly across your wall can mimic the farmhouse style beautifully.
How to Do It:
- Cut plywood or MDF into long strips, around 5–6 inches wide.
- Nail or glue them horizontally onto the wall, leaving a small gap between each strip.
- Paint the entire wall in white, soft gray, or a cozy beige for that rustic finish.
Why It Works:
It adds clean, horizontal lines that make the room feel more open, great for entryways, bedrooms, or bathrooms.
7. Board and Batten with Budget MDF
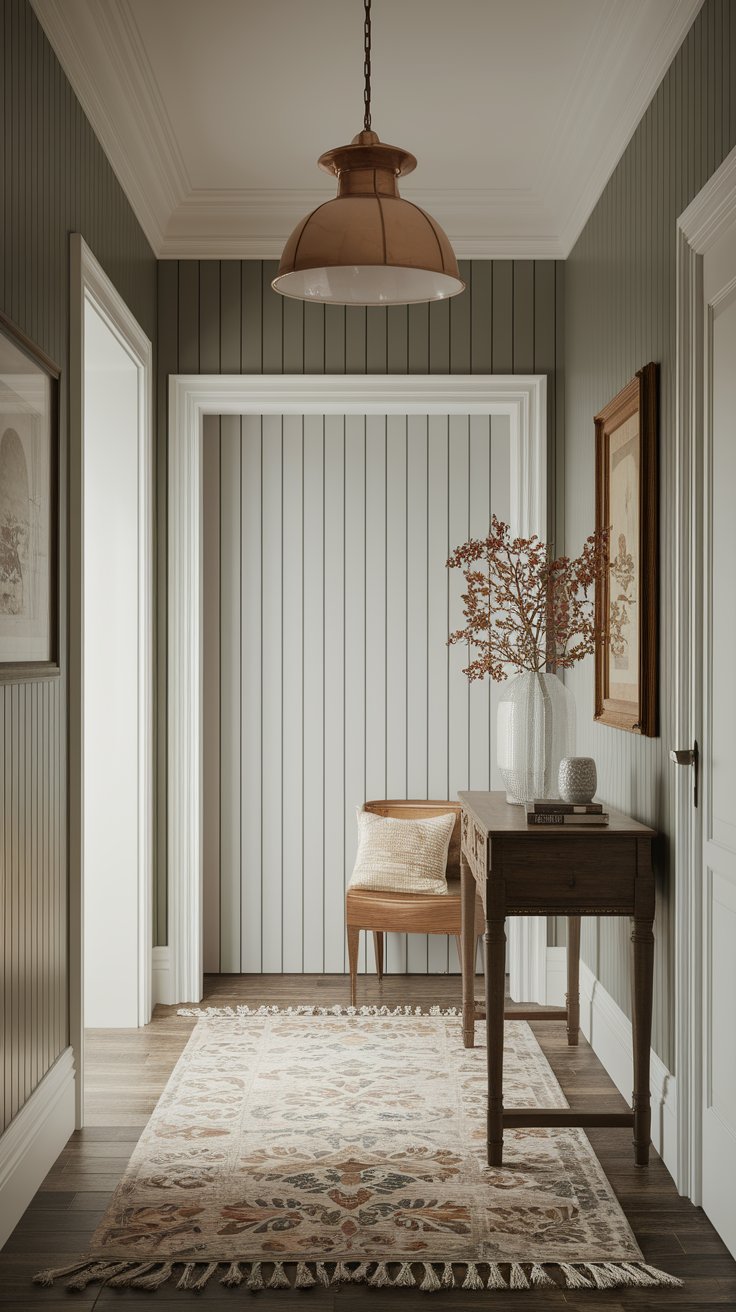
This traditional look is surprisingly easy to DIY. It creates a grid or vertical panel effect that looks expensive but costs very little.
How to Do It:
- Measure and cut vertical MDF or wood trim boards to your desired height.
- Space them evenly across the wall and secure with finishing nails or construction adhesive.
- Add a horizontal board along the top edge for definition.
- Fill gaps with caulk, then paint the whole wall one color.
Why It Works:
It’s timeless and can look both modern or vintage, depending on your paint color and trim width.
8. Peel-and-Stick Wood Plank Wall
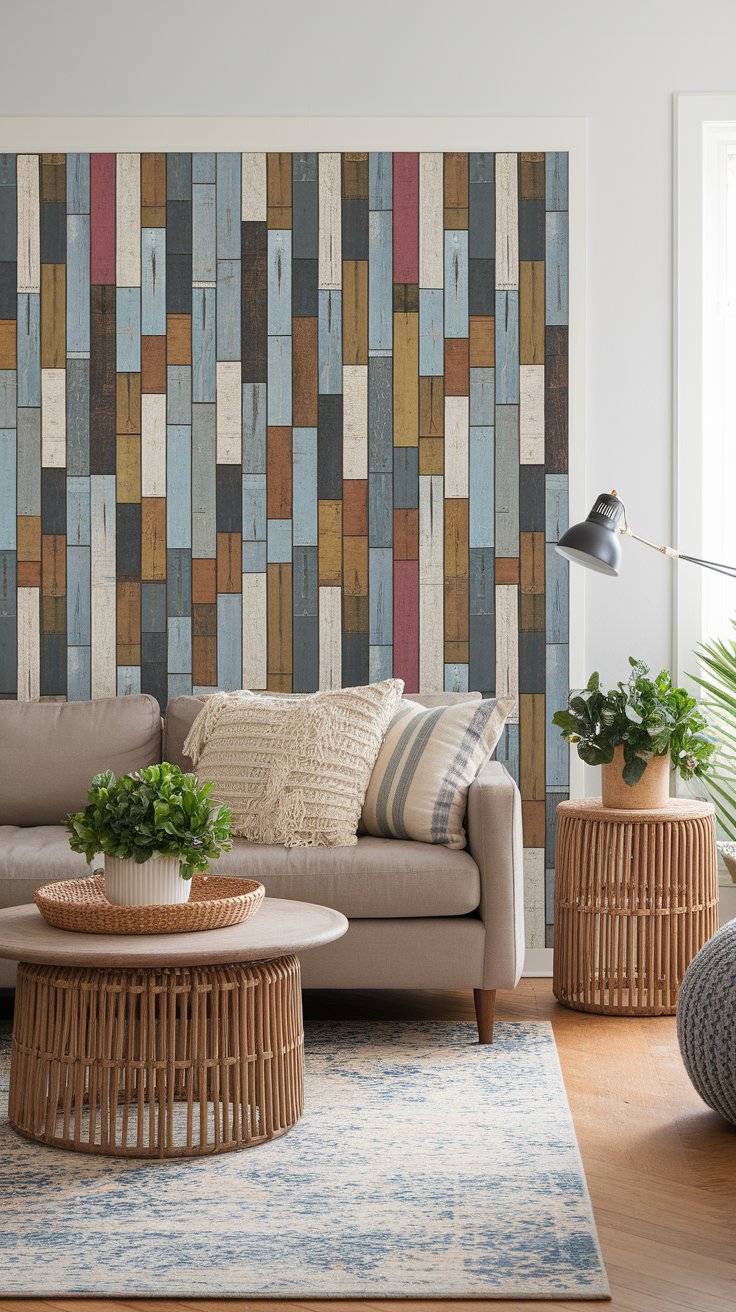
For a quick transformation, use peel-and-stick wood planks to create a reclaimed wood effect. Many brands offer lightweight, adhesive-backed panels in different colors and finishes.
How to Do It:
- Clean your wall surface.
- Start from the bottom or center and peel the backing as you go.
- Stagger your plank lengths to create a natural wood pattern.
- Press firmly to secure, and trim edges as needed with a craft knife or handsaw.
Why It Works:
It gives that cozy cabin or boho look with almost no mess, and it’s easy to remove later.
9. DIY “Brick” Wall with Joint Compound and a Stencil
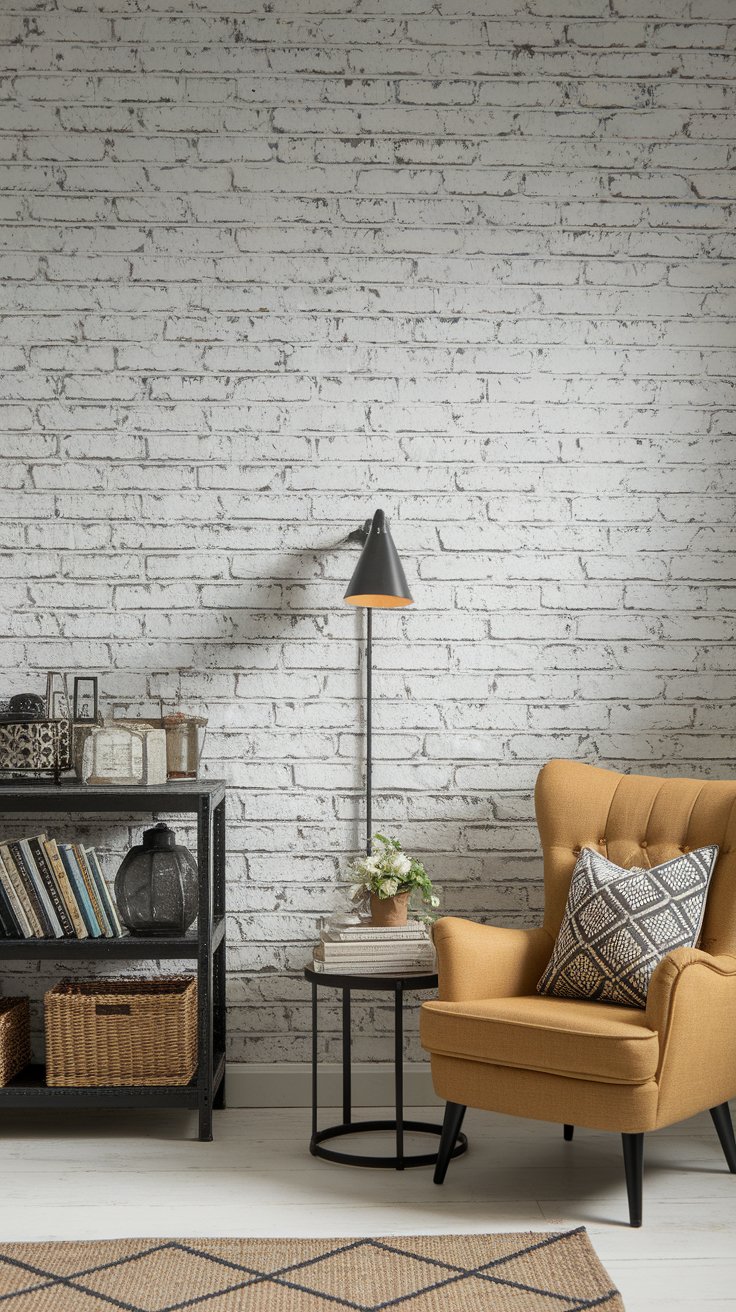
Love the look of exposed brick? You can fake it with just joint compound and a stencil.
How to Do It:
- Tape a brick stencil to your wall.
- Apply a thin layer of joint compound using a putty knife.
- Remove the stencil carefully and let dry.
- Paint the dried “bricks” in brick red, whitewash, or any tone you like.
- Optional: Add shadows with a small brush to enhance the depth.
Why It Works:
It adds industrial charm or European loft vibes, perfect for a reading corner or creative studio.
10. Herringbone Wood Accent Wall Using Scrap Pieces
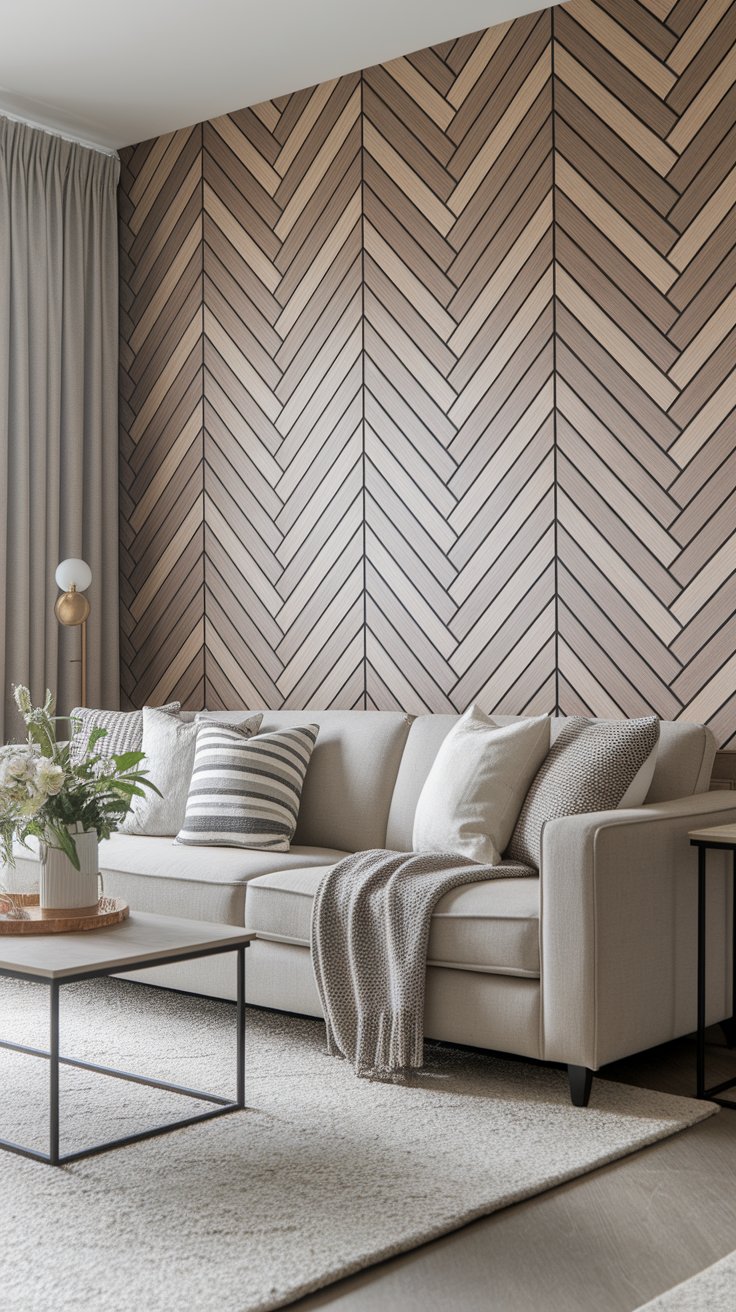
This is a showstopper, perfect if you love geometry and have leftover wood or want to use budget-friendly trim.
How to Do It:
- Mark your centerline vertically on the wall.
- Cut wood strips at 45-degree angles and begin laying them in a herringbone pattern outward.
- Use wood glue or small nails to attach.
- Fill gaps, sand lightly, and paint or stain your finished wall.
Why It Works:
It adds rhythm and elegance, and it can be stained for a luxe feel or painted pastel for a quirky modern look.
Creative & Artistic Accent Walls
These DIYs let you turn your wall into a canvas. Whether you’re painting freehand shapes, working with thrift finds, or layering materials, these ideas are great for creatives or anyone looking to make a bold, personal statement without breaking the bank.
11. Fabric or Tapestry-Covered Wall
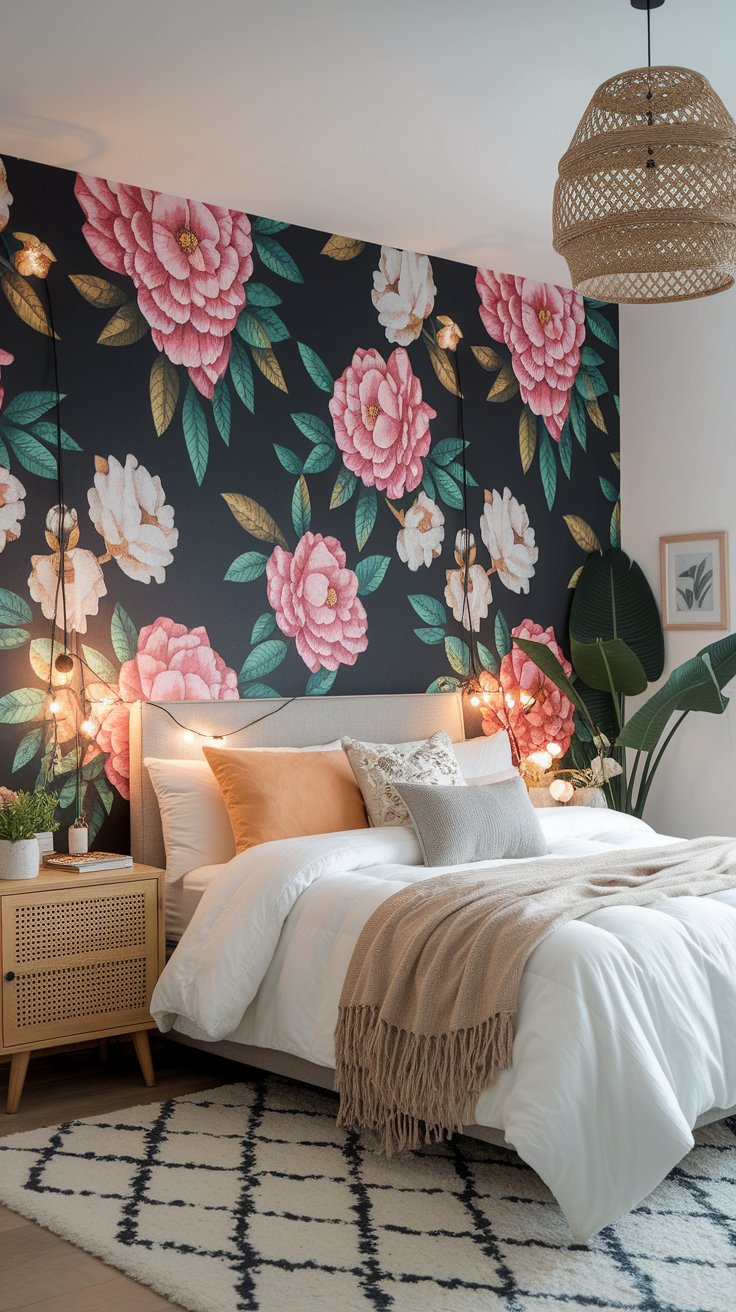
Add softness, pattern, and a boho touch by covering a wall (or section of it) with a beautiful fabric or hanging tapestry. It’s the easiest way to add color and texture, no paint required.
How to Do It:
- Choose a lightweight fabric (cotton, muslin, or even a flat sheet).
- Secure it with tacks, removable hooks, or a curtain rod mounted close to the ceiling.
- For a clean look, fold and pin the edges behind the fabric.
- Layer two tapestries or hang a string of lights in front for extra effect.
Why It Works:
It’s completely removable, customizable, and instantly changes the mood of the room.
12. Painted Mural or Abstract Shapes Wall
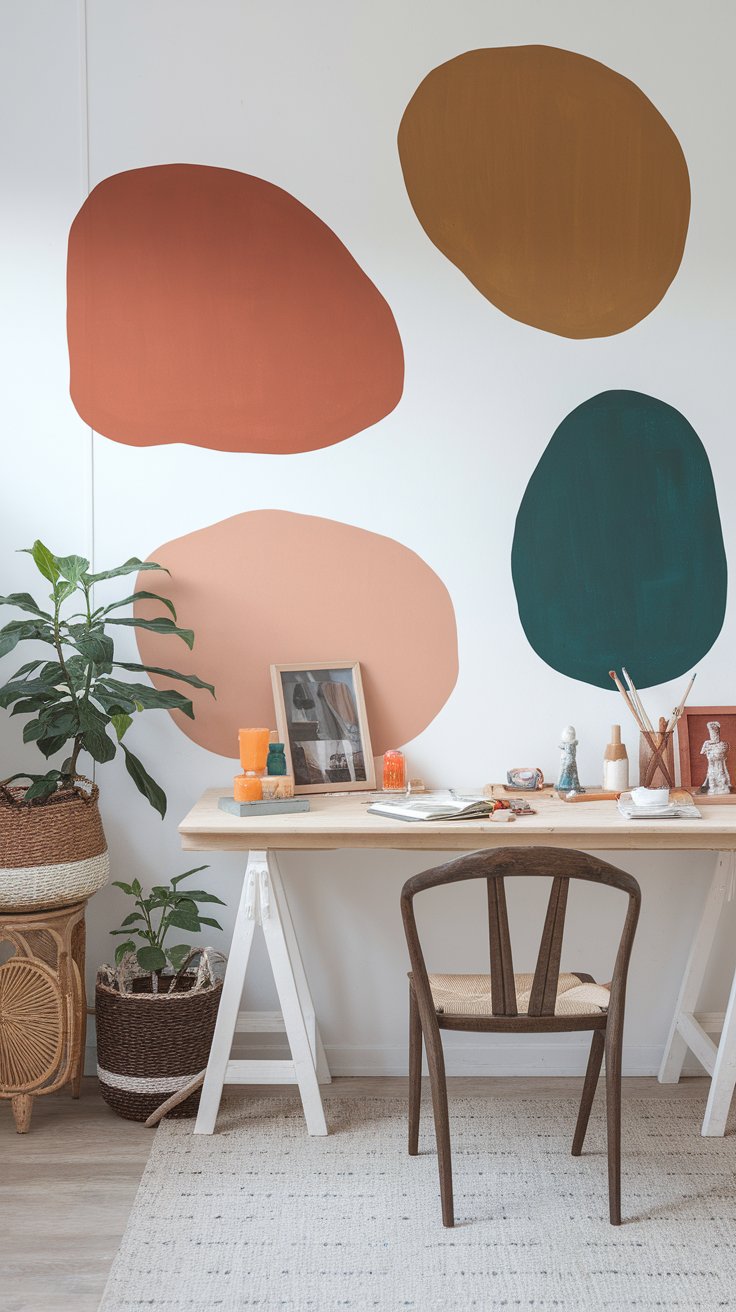
Hand-painted shapes, blobs, or brush strokes give your wall an artsy, one-of-a-kind vibe. You don’t need to be an artist, just pick a palette and start free-form painting.
How to Do It:
- Sketch shapes lightly with pencil or chalk.
- Use flat or matte paint and fill in your design.
- Stick to a consistent color theme for cohesion (think sunset tones, earth tones, or candy pastels).
- Let dry and clean up the edges with a small brush.
Why It Works:
It’s unique, expressive, and surprisingly easy to repaint or cover later.
13. Gallery Wall with Thrifted Frames
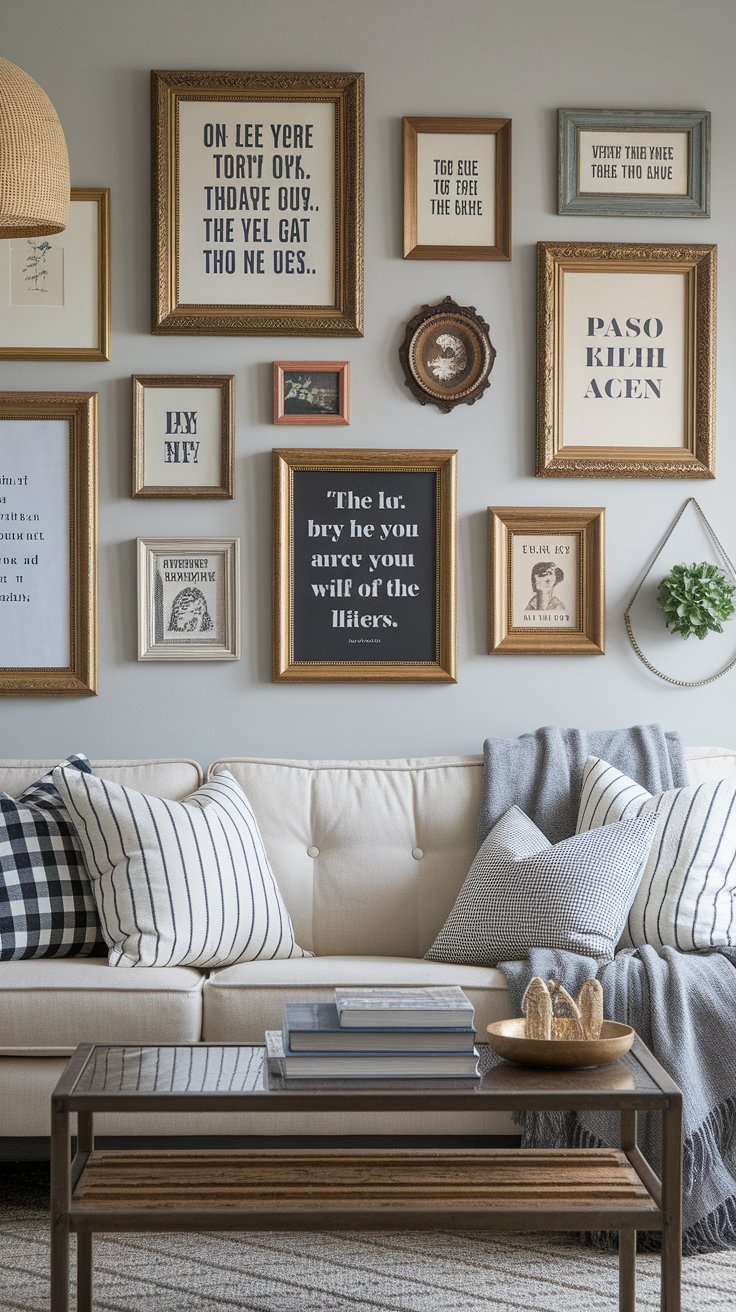
A curated wall of photos, prints, quotes, and art makes any room feel personal. The secret? Use mismatched thrifted frames and unify them with a single color.
How to Do It:
- Collect frames in different sizes and shapes from thrift stores or dollar shops.
- Spray paint them all in white, gold, black, or a pastel tone.
- Print out your own art, quotes, or use vintage postcards.
- Arrange them on the floor first, then hang using removable strips.
Why It Works:
It’s completely personal, evolves over time, and turns blank walls into storytelling pieces.
14. DIY Washi Tape Pattern Wall (Renter-Friendly)
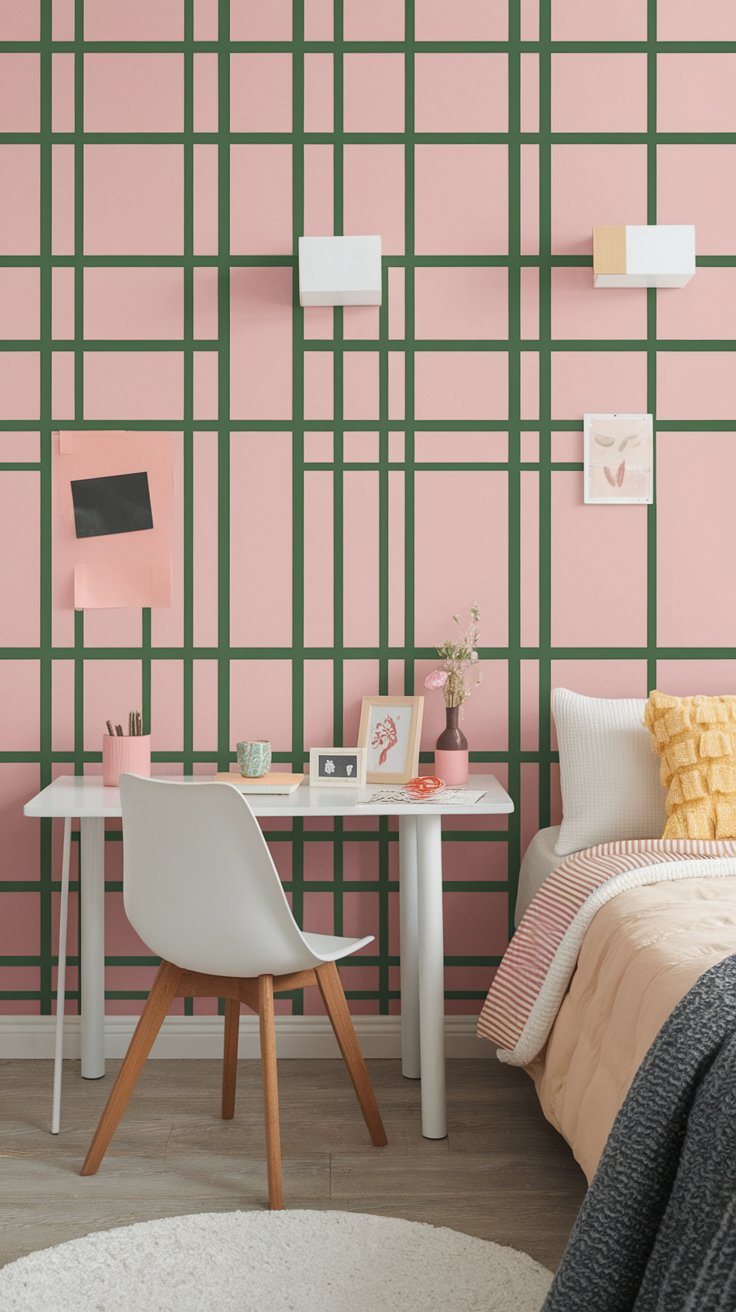
Create graphic patterns or outlines using colorful washi tape. You can do diamonds, stripes, grids, arches, or even faux “paneling”, all without damaging the wall.
How to Do It:
- Choose 2–3 coordinating washi tape colors.
- Plan your pattern and measure lightly with a ruler or level.
- Apply the tape with clean, even pressure to avoid peeling.
- Remove and replace anytime, no tools, no mess.
Why It Works:
It’s quick, affordable, and ideal for dorms or rented spaces.
15. 3D Wall Art Grid Using Foam Boards or Light Wood
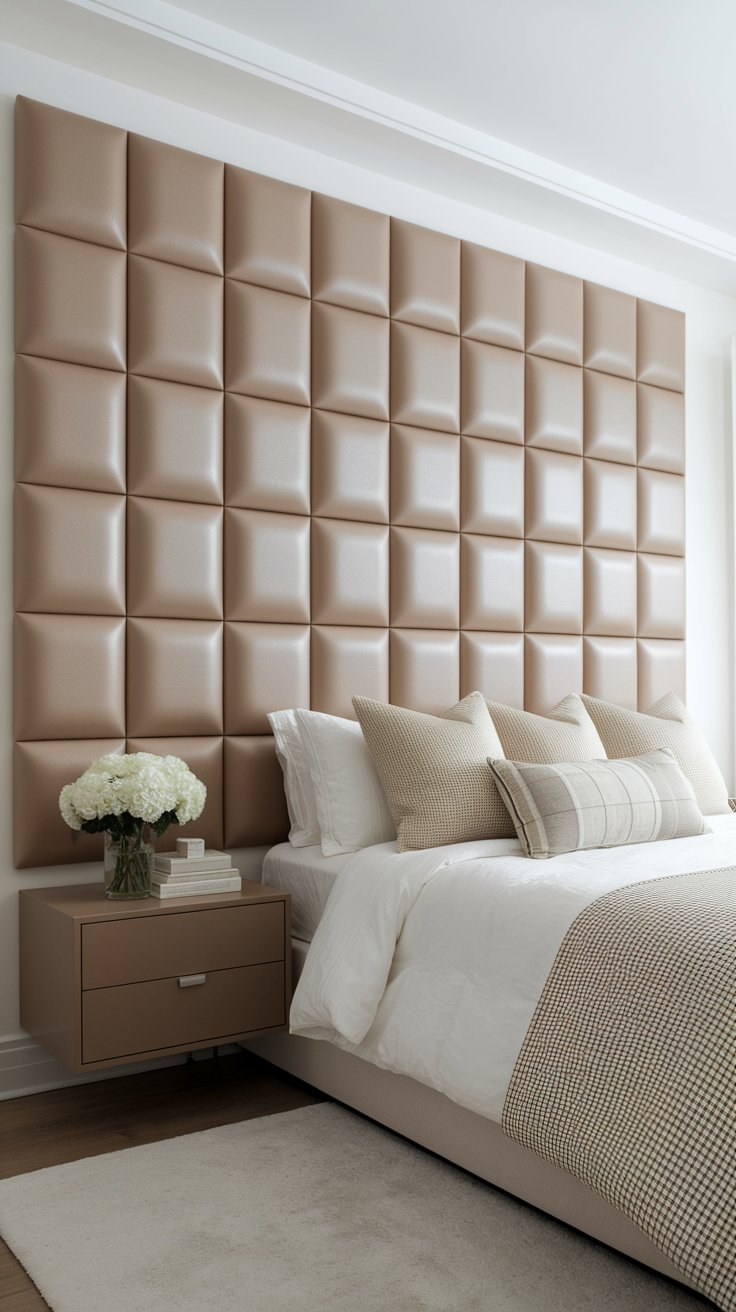
If you want structure but not full paneling, try attaching square foam boards or thin wood panels in a grid for a raised, architectural look.
How to Do It:
- Cut foam boards or MDF into equal squares (around 12″x12″).
- Paint them in your chosen color or wrap in fabric.
- Attach with heavy-duty double-sided tape in even rows and columns.
- Optional: Add small gaps between them for a floating panel effect.
Why It Works:
It adds quiet drama and sophistication, especially when painted in soft matte tones.
Tips for a Successful DIY Accent Wall
Before you dive into any of these projects, a few smart planning steps can make the difference between “pretty good” and “absolutely stunning.” These tips will help your DIY accent wall turn out polished, without stress or extra trips to the hardware store.
1. Choose the Right Wall
Pick a natural focal point, behind your bed, your couch, your desk, or a hallway wall you see often. Avoid overly cluttered or low-visibility areas. A good accent wall should feel intentional, not random.
2. Start with a Mockup or Sketch
Before taping or painting, sketch out your idea on paper or use a free room design app. This helps you visualize the colors, patterns, and proportions, and catch mistakes before they happen.
3. Test Paint and Materials First
Colors and textures can look different on your actual wall than they do in your hand or on a screen. Paint small swatches or test panels before committing to a full wall, especially with bold tones or layered textures.
4. Don’t Skip Surface Prep
Clean, sanded, and dust-free walls give the best results. If you’re using adhesives, paint, or wood, starting with a smooth surface helps everything stick better and look cleaner.
5. Use Leveling Tools for Precision
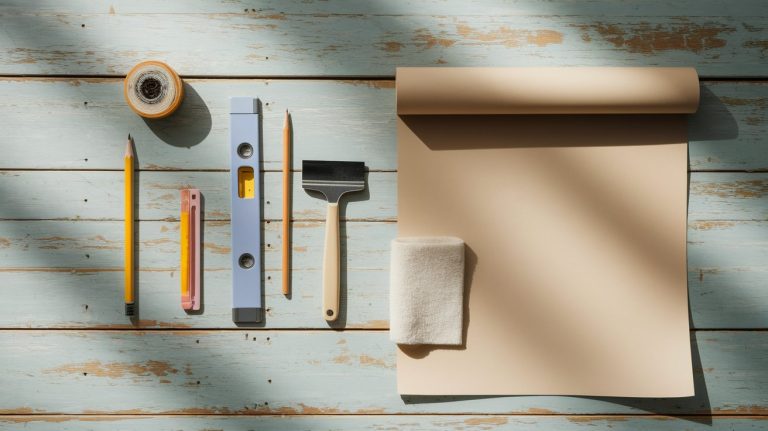
A laser level or simple bubble level will keep your lines straight, especially for shiplap, grid walls, or geometric paint designs. Even a slight slant becomes noticeable on a full wall.
6. Embrace Imperfection (Within Reason)
Accent walls made by hand may not look factory-perfect, and that’s okay. As long as your lines are mostly clean and your design looks balanced, a little texture or asymmetry adds charm.
Final Thoughts
DIY accent walls are one of the most rewarding home projects you can take on. They make a huge visual impact, allow you to express your style, and often cost less than a dinner out. Whether you’re working with paint, wood, fabric, or tape, there’s a solution that fits your space, budget, and skill level.
And the best part? You don’t need to be an expert. With just a free weekend, a few tools, and a little patience, you can turn a blank wall into your favorite part of the house.
FAQ: DIY Accent Wall Projects
What is the easiest DIY accent wall for beginners?
The easiest project is a painted half-wall or color block. It requires only painter’s tape, a roller, and one color of paint. Washi tape patterns and fabric walls are also great beginner-friendly options, no power tools needed.
Can I do a DIY accent wall in a rental?
Yes! Many ideas are renter-friendly. Use washi tape, peel-and-stick wallpaper, removable hooks, and fabric panels. These allow you to personalize your space without leaving marks or damaging the walls when it’s time to move out.
How do I choose which wall to accent?
Pick the wall that naturally draws your eye when you enter the room. It’s often the wall behind your bed, sofa, or desk. Avoid walls with too many windows or doors, as they can break up your design.
How much does a DIY accent wall usually cost?
It depends on the method. A simple painted design may cost $20–$40 for paint and tape. More detailed projects like wood paneling or peel-and-stick tiles can range from $50 to $150 depending on materials. Many ideas in this guide can be done for under $50.
Can I mix patterns or colors on an accent wall?
Yes, but stick to one focal pattern or texture, and use coordinating tones to avoid visual clutter. For example, a geometric wall in varying shades of blue or a gallery wall with all-white frames creates unity even with different elements.
Related Articles:
- How to Achieve a Cozy Home Aesthetic with DIY Decor.
- How to Install A Peel And Stick Accent Wall In One Afternoon
- 30 DIY Bedroom Decor Ideas for Women Who Redecorate Every Season