These DIY Rustic Bathroom Vanities Are So Gorgeous, You’ll Want to Redo Yours Tomorrow
Rustic bathroom vanities are the perfect mix of rugged beauty and timeless charm.
With their raw textures, warm woods, and handcrafted feel, they instantly make a bathroom feel more inviting, and the best part is, you don’t have to spend a fortune to get the look.
This roundup of rustic DIY vanity ideas will inspire you to roll up your sleeves and transform your space with something that looks straight out of a cabin retreat.
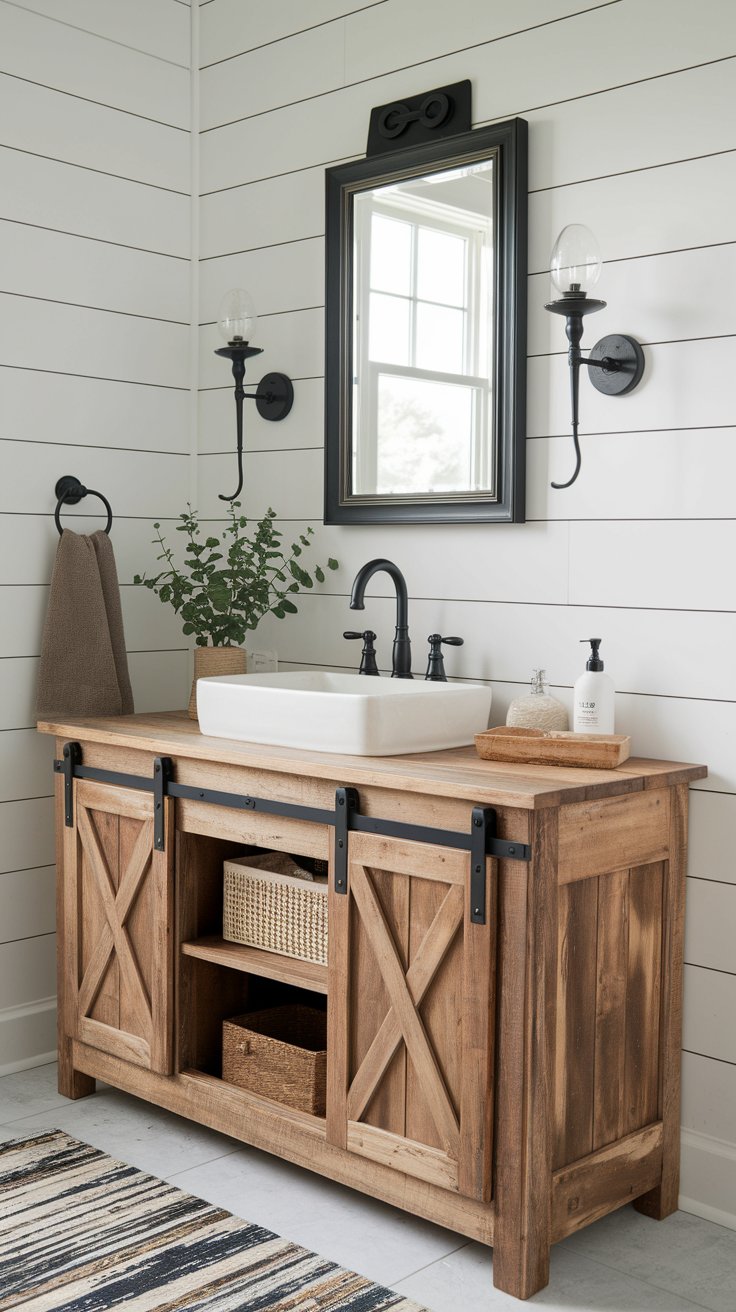
1–3. Rustic Wood Slab Vanities That Celebrate Natural Beauty
These designs highlight the raw, organic elements of wood, perfect for those who love the idea of bringing the outdoors inside.
1. Live Edge Wood Vanity with Vessel Sink
Why It Stuns:
The uneven, natural edge of the wood makes every vanity one-of-a-kind. Paired with a sleek vessel sink, it creates a balance between rugged and refined.
Materials You’ll Need:
- Live edge hardwood slab (oak, walnut, or cedar)
- Heavy-duty wall brackets or floating shelf hardware
- Clear waterproof finish (polyurethane or epoxy resin)
- Vessel sink and faucet
How to Build It:
- Cut the slab to your desired length and lightly sand the edges while preserving the natural shape.
- Drill a hole for plumbing and mount the slab on wall brackets secured into studs.
- Finish the surface with multiple coats of waterproof sealant.
- Install the sink and faucet, ensuring all fittings are sealed tightly.
Style Tip: Add stone or slate accents and soft lighting to complete the look.
2. Floating Reclaimed Wood Vanity
Perfect For: Small bathrooms or powder rooms that need a rustic touch without taking up floor space.
Materials:
- Reclaimed wood boards (from pallets, barn wood, or salvage yards)
- Wood screws or pocket hole joinery
- Wall-mounted sink or vessel sink
- Matte sealant for a natural finish
How to Do It:
- Create a box-style frame from reclaimed planks.
- Reinforce it with interior supports and secure it to wall studs using hidden brackets.
- Install the sink and plumbing.
- Add a narrow shelf beneath if extra storage is needed.
Bonus Touch: Leave visible nail holes and saw marks to add authentic character.
3. Rough-Cut Cedar Vanity with Open Shelf
This One’s All About Texture:
Using rough-sawn cedar adds grain, tone, and warmth that feels handcrafted and lived-in.
Materials List:
| Component | Suggested Material |
|---|---|
| Frame | 2×4 rough-sawn cedar |
| Top surface | Cedar plank or butcher block |
| Shelf | Slatted cedar boards |
| Finish | Natural oil or clear matte sealant |
Build Breakdown:
- Frame the base with sturdy cedar boards and attach legs.
- Add a lower shelf for towels or baskets.
- Install a wood or stone countertop and drop-in sink.
- Finish with a matte sealant to retain the rustic feel without adding shine.
Visual Tip: Pair with galvanized metal hardware or antique-style knobs to complete the rustic theme.
4–6. Upcycled Furniture to Rustic Masterpieces
One of the easiest ways to create a rustic vanity is by transforming old furniture into something beautiful and functional. These ideas give forgotten pieces new life—without sacrificing style.
4. Vintage Dresser Turned Rustic Vanity
Why It Works:
A vintage dresser has the perfect size and structure for a bathroom vanity. The drawers offer storage, and the character of the wood brings instant charm.
Materials You’ll Need:
- Solid wood dresser (preferably vintage or antique)
- Jigsaw or hole saw (for cutting plumbing openings)
- Sandpaper and stain or chalk paint
- Waterproof sealer
- Sink and faucet
Steps to Make It:
- Choose a dresser with a solid wood top and deep drawers.
- Cut holes in the top for plumbing and make space in the back for pipe access.
- Keep the top drawer as a “false front” or cut it to fit around plumbing.
- Refinish with stain or chalk paint, then seal with polyurethane.
- Add a vessel sink or drop-in sink on top and secure plumbing.
Design Tip: Swap out old hardware for wrought iron or bronze pulls to elevate the rustic style.
5. Rustic Farmhouse Buffet Vanity
Best For: Larger bathrooms or double-sink setups.
Why Buffets Work:
They offer lots of counter space, deep cabinet storage, and an open lower frame that makes plumbing installation easier than you’d expect.
How to Convert One:
- Sand and refinish the buffet in a warm wood tone or paint it distressed white.
- Remove or shorten center drawers to accommodate plumbing.
- Cut out sink and faucet openings.
- Add a wood or stone top if needed.
Bonus Idea: Install sliding barn-style cabinet doors for extra farmhouse flair.
Storage Tip: Use baskets or vintage crates in open compartments to keep the rustic theme going strong.
6. Antique Washstand Vanity With Modern Fixtures
Charming and Compact:
Old washstands are small but full of charm, making them perfect for powder rooms or guest baths.
Materials:
- Antique washstand (with or without a marble top)
- Small vessel sink
- Polished brass or matte black faucet
- Wood filler and sandpaper
- Waterproof topcoat
How to Create It:
- Fill in any deep scratches or gaps with wood filler, then sand.
- Cut a hole in the top surface for your sink and faucet.
- Refinish the washstand in a color or stain that highlights the wood grain.
- Seal thoroughly and install sink and fixtures.
Styling Tip: Hang an antique mirror above and place a small vase of dried flowers on the counter to complete the look.
7–9. DIY Farmhouse-Style Vanities With Storage
Farmhouse vanities aren’t just pretty—they’re practical. These builds give you the rustic texture you love with smart storage for everyday use.
7. Shiplap-Wrapped Base With Sliding Doors
Why It Stands Out:
Shiplap gives that signature farmhouse texture, while sliding cabinet doors add charm and save space.
Materials You’ll Need:
- 2x4s and plywood for base frame
- Pre-cut shiplap or tongue-and-groove boards
- Mini barn door hardware
- Wood stain or chalk paint
- Sink and faucet
How to Build It:
- Frame a simple rectangular vanity box using 2x4s.
- Wrap the front and sides with horizontal shiplap boards.
- Install a barn door track and hang sliding doors to hide storage compartments.
- Finish with a wood top, drop-in sink, and your chosen fixtures.
Storage Tip: Use baskets or crates behind the sliding doors for a neat, rustic look.
8. Open Crate-Style Vanity With Towel Shelf
Perfect For: Smaller bathrooms or guest baths where you want to keep things open and airy.
Why It Works:
The slatted crate structure provides both visual interest and functional space for towels, baskets, or extra toiletries.
Materials List:
- 1×4 boards for crate-style sides
- 2x2s for frame support
- Plywood or wood plank top
- Waterproof finish
Build Breakdown:
- Build a basic box frame with 2x2s.
- Add slatted wood side panels using 1x4s for a crate look.
- Attach a lower shelf with wider planks.
- Finish the wood with a weathered gray or golden oak stain.
Styling Idea: Roll white towels and stack them on the open shelf for a spa-like effect.
9. Double-Sink Vanity From Framed 2x6s
Best For: Larger bathrooms or couples who need separate sink space.
Design Highlight:
Using 2x6s gives you a solid, rustic structure with thick, visible framing that feels hand-built and intentional.
Materials:
- 2×6 lumber for frame
- Pocket hole jig and wood screws
- Drawer slides and wood for built-in drawers
- Large wood or stone counter
- Double drop-in sinks and fixtures
Build Steps:
- Measure and cut your framing to allow space for two sinks.
- Assemble the base and side panels using pocket hole joinery.
- Add crossbars for drawer supports or lower open shelving.
- Stain or distress as desired, then install countertop and sinks.
Finish Touches: Add hardware that matches your mirror or lighting for cohesion.
10–12. Small Rustic Vanities for Compact Bathrooms
Just because you’re working with limited space doesn’t mean you have to sacrifice style. These compact rustic vanity ideas are proof that small can still be stunning.
10. Reclaimed Console Table Turned Slim Vanity
Why It Works:
Console tables have just enough depth to fit a narrow sink, making them perfect for tight bathrooms.
Materials You’ll Need:
- Slim wood console table (look for vintage or reclaimed wood)
- Small vessel sink
- Wall-mounted or single-hole faucet
- Waterproof sealer
Steps:
- Choose a sturdy console with a solid wood top.
- Cut plumbing holes and apply multiple coats of water-resistant sealer.
- Install the sink and faucet.
- Add a towel hook or shelf below for bonus function.
Tip: Leave the wood raw or lightly stained for that unfinished, authentic rustic charm.
11. Floating Vanity Shelf With Rustic Beam
Ideal For: Powder rooms and half baths with minimal floor space.
What You’ll Need:
- Thick reclaimed wood beam or slab (at least 2 inches thick)
- Heavy-duty L-brackets or floating shelf hardware
- Vessel sink
- Matte finish sealant
How to Install:
- Mount the brackets into studs at the right height.
- Secure the wood slab and drill for plumbing.
- Seal well and install fixtures.
Visual Benefit: This design keeps the floor clear, making a tiny room feel much more open.
12. Rustic Corner Vanity With Pallet Wood
Why It Works:
Corners are often wasted in small bathrooms, but this setup turns it into a design feature.
Materials:
- Pallet boards or reclaimed fence panels
- Plywood base for strength
- Triangle-cut wood top or butcher block
- Compact corner sink
Build Steps:
- Create a triangular cabinet using plywood for the base and back.
- Wrap the sides with pallet boards in a chevron or horizontal pattern.
- Cut the top to size and install the corner sink.
- Add a small cabinet door or open shelf beneath.
Styling Tip: Use rustic knobs or iron latches for the cabinet door to enhance the farmhouse feel.
13–15. Painted & Distressed Rustic Vanities
Adding paint or a distressed finish can instantly transform an ordinary piece into a rustic showstopper. These techniques bring softness, color, and history into your bathroom without overpowering the space.
13. Chalk-Painted Vanity With Soft Edges
Why It Works:
Chalk paint creates a soft, powdery finish that feels timeworn and cozy. It’s easy to apply and gives even modern pieces a vintage look.
Materials You’ll Need:
- Basic wood vanity or small cabinet
- Chalk paint (choose earthy tones like sage, clay, or ivory)
- Clear wax or polyurethane sealant
- Sandpaper or sanding block
How to Get the Look:
- Lightly sand the surface for better paint adhesion.
- Apply 1–2 coats of chalk paint.
- Once dry, lightly sand the edges and corners to create subtle wear.
- Finish with a protective wax or sealer.
Design Tip: Pair with a porcelain sink and soft-brushed hardware for a cozy cottage vibe.
14. Two-Tone Rustic Vanity
A Perfect Blend:
Combining a stained wood top with a painted base creates contrast and draws the eye to the craftsmanship.
Materials:
- Any basic wood vanity or upcycled furniture
- Wood stain for the countertop
- Matte or milk paint for the base
- Sandpaper, sealant, and new hardware
Build Steps:
- Strip or sand the top surface to bare wood.
- Stain the top in a warm or weathered tone (like walnut, espresso, or driftwood).
- Paint the base in a contrasting tone like white, navy, or muted green.
- Distress the base gently and finish with matte sealer.
Popular Combinations:
| Top (Stain) | Base (Paint) |
|---|---|
| Dark walnut | Cream or linen white |
| Weathered gray | Sage green |
| Honey pine | Dusty blue |
15. Dry-Brush Distressed Vanity for a Farmhouse Finish
Why It Feels Authentic:
Dry brushing gives a naturally aged finish, letting the wood grain peek through the paint in a subtle, charming way.
How to Do It:
- Dip the brush lightly in paint, then wipe most of it off on a paper towel.
- Drag the brush lightly over the wood surface, letting streaks and wood show through.
- Build up layers if needed, but keep strokes light and irregular.
- Seal with clear matte poly for durability.
Extra Touch: Add vintage glass knobs or ceramic pulls to contrast the texture with a delicate detail.
16–18. Rustic Industrial Mixes for a Modern Edge
If you love the warmth of rustic wood but want something a little more bold or edgy, try mixing in industrial elements like metal, concrete, or exposed hardware. These builds balance natural texture with sleek strength.
16. Reclaimed Wood Vanity With Metal Pipe Legs
Why It Works:
Metal piping brings structure and contrast, while reclaimed wood softens the look and adds age.
Materials:
- Reclaimed wood planks (for top and optional lower shelf)
- Black steel pipe and fittings (for legs and frame)
- Flanges and screws
- Sink and fixtures
How to Build It:
- Assemble a pipe base with T-joints and flanges for stability.
- Cut your wood top to size and drill for sink and plumbing.
- Attach the wood to the metal frame using pipe straps or hidden brackets.
- Optionally add a lower shelf using more wood and pipe supports.
Style Tip: Use matte black or oil-rubbed bronze fixtures to match the industrial frame.
17. Concrete Vanity Top on a Wood Base
The Best of Both Worlds:
Rustic wood brings warmth, while concrete delivers durability and that sleek, utilitarian edge.
Materials:
- Concrete mix (or a precast concrete counter)
- Wood frame or cabinet base
- Rebar mesh (optional for strength)
- Water sealant for the concrete
Steps:
- Build a wood form for your counter and pour the concrete, embedding mesh if needed.
- Cure the slab fully, then sand smooth and seal.
- Install on a rustic base—this can be a wood vanity, a crate-style frame, or even an upcycled table.
- Add sink and faucet.
Design Tip: Pair with subway tile backsplash or metal sconces to complete the look.
18. Rustic Wood Vanity With Steel Mesh Doors
Why It’s Unique:
Steel mesh doors create visibility and ventilation while adding texture and an industrial vibe.
Materials You’ll Need:
- Plywood or solid wood base
- Steel mesh panels or chicken wire
- Wood frame for cabinet doors
- Hinges and magnetic closures
Assembly Overview:
- Build a wood vanity base with front openings for cabinet doors.
- Create door frames and staple steel mesh to the back.
- Attach the doors with basic hinges.
- Finish the wood with dark stain or paint, then seal.
Hardware Tip: Use metal latches or handles with rivet details to lean into the industrial style.
19. Custom-Built Rustic Vanity From Scratch
If you’re ready to fully control the look, size, and materials of your vanity, building one from the ground up allows for complete customization and a truly handmade finish.
Why It’s Worth It:
You get a one-of-a-kind piece that fits your bathroom perfectly, with every detail tailored to your vision and needs.
What You’ll Need:
| Material | Purpose |
|---|---|
| 2×4 or 2×6 lumber | Frame and legs |
| Plywood or tongue-and-groove | Side and back panels |
| Hardwood planks or butcher block | Countertop |
| Sink + faucet of choice | Function and design |
| Wood glue, pocket screws, nails | Assembly tools |
| Waterproof sealer | Protects from moisture and wear |
Build Steps:
- Plan Your Dimensions: Measure your space and sketch your vanity’s size and features.
- Build the Frame: Use 2x4s or 2x6s to construct a sturdy rectangular frame.
- Add Siding & Details: Attach plywood panels or vertical boards to form sides, back, and base.
- Customize Storage: Add drawers or an open shelf using drawer slides or slatted wood supports.
- Top It Off: Use a thick wood top or butcher block, cut for your sink and faucet.
- Sand, Stain, and Seal: Choose a rustic stain and apply a waterproof finish to keep it bathroom-safe.
- Install Your Sink & Hardware: Once sealed and dry, finish by connecting your plumbing and installing fixtures.
Finishing Touch: Add soft-close drawer slides and antique brass or matte black pulls for a polished rustic feel.
Final Thought
A rustic vanity is more than just a place to wash your hands—it’s the centerpiece of a warm, lived-in bathroom. Whether you’re working with a flea market find, salvaged lumber, or brand-new materials, these ideas prove you can craft something truly stunning with a bit of effort and creativity.
Go bold with a custom build, or start small with a chalk paint makeover. No matter your skill level or budget, there’s a rustic DIY vanity project waiting to bring character to your bathroom.
FAQs
What type of wood is best for a rustic bathroom vanity?
Cedar, pine, and oak are all great choices for rustic style. Reclaimed wood or barn wood adds natural age and charm, but be sure to seal everything thoroughly for moisture protection.
How do I waterproof my DIY vanity?
Use waterproof wood glue during assembly and seal all surfaces with a clear polyurethane or marine-grade finish. Pay extra attention to edges and joints.
Can I build a rustic vanity without power tools?
You can convert existing furniture with just basic tools like a handsaw, drill, and screwdriver. For custom builds, power tools will save time and ensure a sturdier result.
How much does it cost to build a rustic vanity?
Repurposing furniture can cost under $100. A full custom build using high-quality wood and new fixtures may range from $200 to $600 depending on materials.
Do rustic vanities work in modern bathrooms?
Yes. Mixing rustic wood with sleek finishes like matte black hardware or a vessel sink can create a modern-rustic style that feels warm but not outdated.
Related Articles:
- 21+ Timeless 1920s Home Decor Ideas to Make Any Room Feel Instantly Iconic
- 19 DIY Bathroom Vanity Ideas So Stunning, You’ll Forget They’re Homemade