21+ Easy DIY Nightstand Ideas So Stylish, No One Will Guess You Made Them
Tired of boring bedroom furniture? These DIY nightstand ideas are so clever and stylish, your friends will think you bought them at a designer store. Ready to transform your space and save money? Let’s dive in!
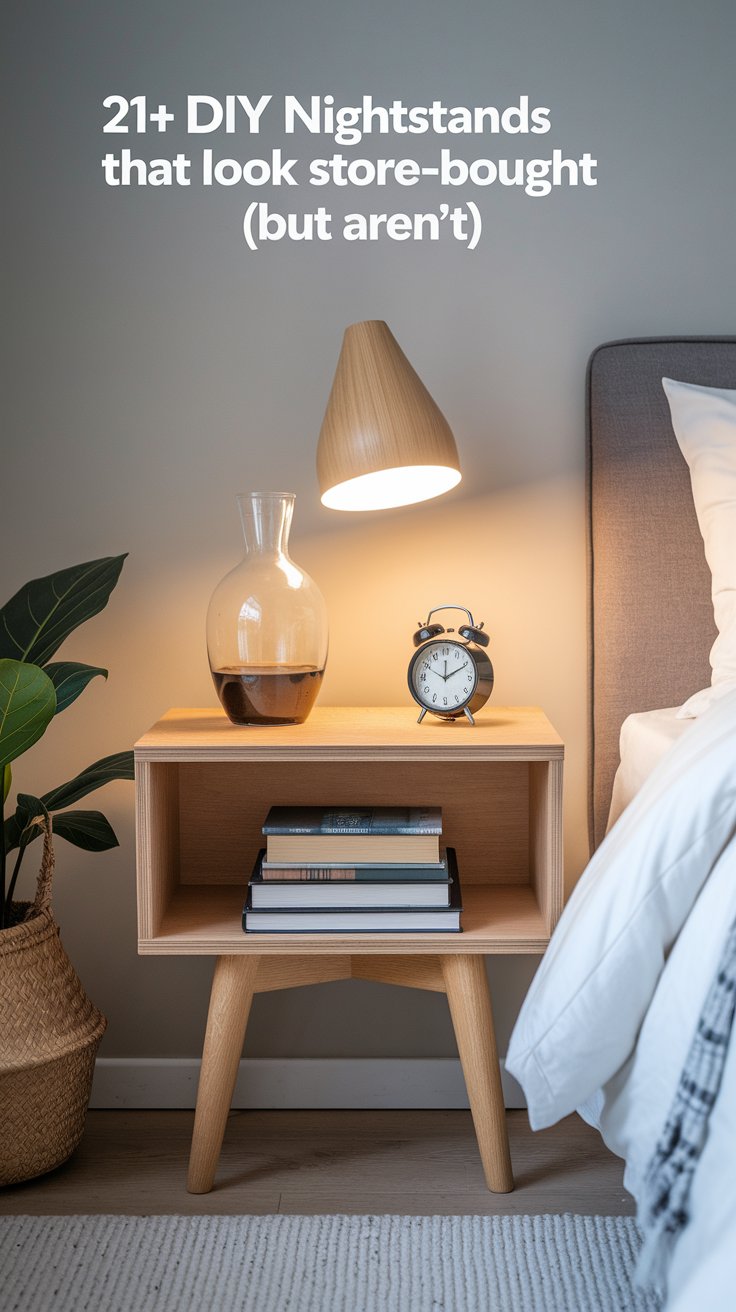
1. Stacked Wooden Fruit Baskets Nightstand
Why You’ll Love It:
Rustic charm meets real storage! Stacked fruit baskets make a unique nightstand that’s both practical and totally on trend.
What You’ll Need:
- 2–3 sturdy wooden fruit baskets (can be found at thrift shops or craft stores)
- Wood glue or small screws
- Optional: Paint or wood stain, clear sealer
How To Do It:
- Clean and Prep: Make sure baskets are clean and sand any rough edges.
- Stack and Secure: Apply wood glue between baskets and stack them, or screw them together for extra strength.
- Customize: Paint, stain, or leave natural depending on your bedroom vibe.
- Seal (Optional): Add a clear sealer for durability.
Styling Tip:
Fill the bottom basket with books or slippers, use the top for your lamp and alarm clock. Add a cozy throw for extra texture.
2. Repurposed Skateboard Nightstand
Why You’ll Love It:
Perfect for teens, dorm rooms, or anyone who loves a pop of personality! A skateboard makes a funky tabletop.
What You’ll Need:
- Old skateboard deck
- 4 table legs (hairpin or wooden) or wall brackets
- Electric drill, screws
- Optional: Sandpaper, paint
How To Do It:
- Prep the Deck: Remove wheels/trucks, sand rough edges, and paint if you want.
- Attach Legs or Brackets:
- Table Legs: Screw one into each corner underneath.
- Wall Brackets: Secure brackets to the wall and rest the skateboard on top for a floating look.
- Place: Position beside your bed—instant cool factor.
Styling Tip:
Choose a board with a graphic that matches your room, or let your kids customize it with stickers and paint!
3. Macramé Hanging Nightstand
Why You’ll Love It:
It floats, it’s artsy, and it frees up floor space! This boho nightstand is perfect for plants, books, or just showing off your craft skills.
What You’ll Need:
- Small round or square wood board (about 12″ across)
- Thick macramé rope or cord (at least 12 ft)
- Ceiling hook or wall bracket
- Scissors, tape measure
How To Do It:
- Drill Holes: Make 3–4 evenly spaced holes near the edge of the board.
- Knot the Ropes: Thread rope through each hole and knot securely underneath.
- Gather & Tie: Bring all ropes together above the board, tie in a big knot, and trim.
- Hang: Screw hook into ceiling or wall, hang your creation, and adjust for level.
Styling Tip:
Top with a trailing plant, a small stack of books, or a candle for instant Pinterest vibes.
4. Vintage Toolbox Side Table
Why You’ll Love It:
This idea turns an old toolbox into a stylish nightstand packed with hidden storage—perfect for stashing books, chargers, or bedside essentials out of sight.
What You’ll Need:
- Vintage wooden or metal toolbox
- Four short furniture legs or hairpin legs
- Screws, drill, and screwdriver
- Optional: Paint, spray paint, or metal polish
How To Do It:
- Clean and Prep: Remove any rust or dirt, sand if necessary, and polish or paint to your taste.
- Attach Legs: Flip the toolbox over and screw in the legs at each corner. Make sure it’s level!
- Style the Inside: Add a small tray or divider if you want to organize the storage space inside.
- Finish: Flip upright and place beside your bed.
Styling Tip:
Keep the lid open for easy access, or close it for a clean, minimalist look. Great for masculine, vintage, or industrial-themed rooms.
5. Illuminated Shadow Box Nightstand
Why You’ll Love It:
A shadow box with soft LED lighting adds a magical glow to your bedroom, acting as both storage and nightlight.
What You’ll Need:
- Deep wooden shadow box (or build your own with 1x6s)
- Frosted plexiglass sheet (cut to fit the front)
- Battery-powered LED strip lights
- Strong adhesive or screws
- Optional: Paint or wood stain
How To Do It:
- Paint or Stain: Customize your shadow box to match your room style.
- Install Lights: Stick the LED strip around the inside back edge of the box.
- Add Plexiglass: Attach the frosted plexiglass to the front with adhesive or small screws.
- Mount or Place: Stand it on the floor or mount it to the wall beside your bed.
Styling Tip:
Store books, keepsakes, or even a tiny plant inside. The gentle glow is perfect for bedtime reading or as a soft nightlight.
6. Suitcase Stack with Secret Charging Station
Why You’ll Love It:
Vintage suitcases are chic and offer loads of hidden storage. Add a built-in charging station and it becomes the smartest spot in your bedroom!
What You’ll Need:
- 2–3 vintage hard-shell suitcases (different sizes look best)
- Multi-plug extension cord or USB charging strip
- Small screws, utility knife
- Optional: Short furniture legs
How To Do It:
- Prep Suitcases: Clean and line the inside with fabric or wallpaper for a polished look.
- Make Space for Cords: Cut a discreet hole in the back of the bottom suitcase for your extension cord to run through.
- Stack & Secure: Stack suitcases from largest to smallest, securing each with small screws or industrial-strength glue.
- Add Charging Station: Place the charging strip inside the top suitcase, feeding the cord out the back.
- Add Legs (Optional): For extra height, screw in short furniture legs.
Styling Tip:
Keep the top suitcase slightly open for easy device charging at night. Stack a reading lamp or your favorite decor on top for that curated, vintage-travel look.
7. Garden Stool as Nightstand
Why You’ll Love It:
This is the ultimate no-build solution. A ceramic, metal, or even plastic garden stool makes a quick, colorful nightstand that’s waterproof, lightweight, and perfect for small spaces.
What You’ll Need:
- 1 garden stool (available at garden centers, decor stores, or online)
- Felt pads (optional, to prevent floor scratches)
How To Do It:
- Pick Your Style: Choose a garden stool that fits your color scheme or adds a fun pop to your space.
- Place: Set the stool beside your bed, adding felt pads underneath if needed.
- Style: Top with a lamp, plant, or your favorite book.
Styling Tip:
Swap out the stool seasonally for a fresh look or use two stools for a playful, balanced feel in larger rooms.
8. Wall-Mounted Folding Tray Table
Why You’ll Love It:
Perfect for tiny bedrooms or guest rooms, this nightstand folds down when you need it and tucks away flat when you don’t. It’s space-saving, modern, and super functional.
What You’ll Need:
- Small wood tray or cutting board
- 2–3 heavy-duty folding shelf brackets
- Screws, drill, wall anchors
- Level, measuring tape
How To Do It:
- Mark Wall Placement: Decide on the right height beside your bed.
- Install Brackets: Attach folding shelf brackets to the wall, using wall anchors for extra stability.
- Attach Tray: Screw the tray or board securely onto the brackets.
- Test: Fold up and down to make sure it works smoothly.
Styling Tip:
Paint the tray a bold color for a fun accent, or stick with wood grain for a natural look. Great for adding a cup of tea, phone, or nighttime essentials without taking up floor space.
9. Book Stack Nightstand (With Secret Drawer)
Why You’ll Love It:
Turn your book collection into a functional piece of furniture! Bonus points for hiding a little drawer inside for jewelry, remotes, or other small treasures.
What You’ll Need:
- 8–12 large hardcover books
- 1 old wooden drawer (small enough to hide in the stack)
- Strong adhesive or drill and screws
- Optional: Decorative paper, small drawer pull
How To Do It:
- Prepare Books: Choose sturdy, similar-sized books for stability.
- Assemble Stack: Arrange books in a neat stack, gluing each layer for strength.
- Add Drawer: Hollow out a spot in the stack to fit the drawer, and glue/screw it securely in place.
- Decorate: Add a pull or label for the secret drawer if you want.
- Finish: Place beside your bed and style the top with a reading lamp.
Styling Tip:
Use vintage books for a classic, library look—or mix bold covers for an artsy, modern vibe. Perfect for book lovers and upcyclers!
10. Reclaimed Window Frame Cubby
Why You’ll Love It:
An old window frame becomes a beautiful, rustic cubby nightstand—perfect for a farmhouse or vintage vibe, and it doubles as a small display shelf.
What You’ll Need:
- Old wooden window frame (without glass is safest)
- 1–2 small wood shelves or boards (cut to fit)
- Wood glue or small screws
- Paint or stain (optional)
- Wall anchors and screws (if mounting to the wall)
How To Do It:
- Prep the Frame: Clean, sand, and paint or stain the window frame as you like.
- Add Shelves: Attach shelves across the inside of the frame with wood glue or screws.
- Install: Either mount the frame to the wall or stand it upright next to your bed.
- Style: Add books, plants, or small décor on the shelves.
Styling Tip:
Hang fairy lights around the window frame for a cozy touch, or tuck in small framed photos for a personalized look.
11. Floating Live Edge Slab
Why You’ll Love It:
A slice of natural wood mounted on the wall brings warmth and organic style to your bedroom. Floating nightstands are ideal for tight spaces and easy to clean around!
What You’ll Need:
- Live edge wood slab (local lumber yards often sell these)
- Heavy-duty L-brackets or floating shelf brackets
- Screws, drill, wall anchors
How To Do It:
- Prep the Slab: Sand the wood smooth, then finish with stain or a clear sealer.
- Install Brackets: Attach brackets to the wall at the right height and spacing.
- Mount the Slab: Secure the slab on top of the brackets using screws.
- Decorate: Style with a lamp, plant, or your nightly reads.
Styling Tip:
Keep décor simple to show off the beauty of the wood grain. Mix with woven baskets or linen bedding for a full natural look.
12. Vintage TV Tray Upcycle
Why You’ll Love It:
Old folding TV trays are cheap, easy to find, and can be turned into super cute, portable nightstands with just a coat of paint or a decoupage design.
What You’ll Need:
- 1 vintage or new TV tray
- Sandpaper
- Paint or decoupage materials
- Clear sealer (polycrylic or spray)
How To Do It:
- Prep: Sand any rough spots and clean the tray thoroughly.
- Paint or Decorate: Add a fun color, pattern, or decoupage using glue and decorative paper or fabric.
- Seal: Apply a clear sealer to protect your design.
- Place: Set next to your bed—easy to move, easy to store.
Styling Tip:
Choose colors and patterns that match your bedding or wall art for a pulled-together look. Use the folding feature to tuck away your nightstand when you need extra space.
13. Pet Bed Nightstand Combo
Why You’ll Love It:
Combine your furry friend’s sleeping spot with your own bedside storage! This two-in-one idea is perfect for pet lovers with limited space.
What You’ll Need:
- Small open nightstand or a side table with a bottom shelf
- Pet bed or a plush cushion (sized to fit under the table)
- Optional: Paint or stain for a custom finish
How To Do It:
- Choose Your Base: Find a sturdy side table or nightstand with an open lower section.
- Customize: Paint or stain to match your decor and seal for durability.
- Add the Pet Bed: Place a soft bed or cushion on the lower shelf or inside the open section.
- Style the Top: Use the upper shelf for your usual bedside items—lamp, books, alarm clock.
Styling Tip:
Coordinate the pet bed fabric with your bedding for a designer look. Add a small basket on top for pet toys or treats.
14. PVC Pipe Modern Table
Why You’ll Love It:
Lightweight, affordable, and totally customizable—PVC pipe legs with a bold tabletop create a statement piece that’s sleek and modern.
What You’ll Need:
- PVC pipes (4 pieces, cut to nightstand height)
- PVC pipe caps (for the ends)
- Round or square wood/MDF tabletop
- Spray paint (optional, for both pipe and tabletop)
- Strong adhesive or screws
How To Do It:
- Cut Pipes: Measure and cut PVC pipes to your desired height (18-24″ is typical for nightstands).
- Paint: Spray paint the pipes and tabletop any color you want. Let dry.
- Assemble: Attach pipe caps to the ends of each pipe, then glue or screw the pipes to the tabletop’s underside at each corner.
- Finish: Place beside your bed and admire your modern creation!
Styling Tip:
Use metallic or neon spray paint for an ultra-modern look, or classic black/white for minimalist style. Top with geometric decor for extra flair.
15. Basket-Weave Nightstand
Why You’ll Love It:
A mini side table wrapped with woven fabric, leather, or jute gives you texture, style, and a custom designer look—without the designer price.
What You’ll Need:
- Basic cube or cylindrical side table (IKEA Lack works great)
- Wide fabric, leather, or jute strips
- Strong glue or staple gun
- Scissors
How To Do It:
- Prep Table: Make sure the table’s surface is clean.
- Start Weaving: Attach one end of each strip to the underside of the tabletop, then wrap and weave around the table sides, securing at the bottom.
- Secure: Glue or staple the ends securely on the underside.
- Trim and Finish: Tidy any loose ends and style the top.
Styling Tip:
Try earth tones for a boho vibe or bold colors for a fun twist. Place a small plant or a woven basket on top to complete the look.
16. Upcycled Record Crate Table
Why You’ll Love It:
Old vinyl record crates are sturdy and stylish, offering both storage and retro flair. Add a simple top and you have a nightstand that’s perfect for music lovers.
What You’ll Need:
- Wooden or plastic record crate
- Wood board (cut to fit as a tabletop)
- Paint or stain (optional)
- Screws, drill, or strong adhesive
- Felt pads (optional)
How To Do It:
- Clean & Paint (Optional): Clean the crate and paint or stain it for your preferred look.
- Add Top: Place the wood board on top. Attach with screws, glue, or leave loose for flexibility.
- Position: Add felt pads to protect your floor, then place beside your bed.
Styling Tip:
Store your favorite records, books, or even slippers inside. Top with a retro lamp or plant for the perfect finishing touch.
17. Industrial Pipe and Concrete Table
Why You’ll Love It:
This industrial-inspired nightstand pairs raw concrete with sleek steel pipes for an ultra-urban look. It’s durable, modern, and seriously unique.
What You’ll Need:
- Pre-cast concrete paver or stepping stone (as tabletop)
- Steel pipe table legs and floor flanges (available at hardware stores)
- Screws, drill, wrench
- Level
How To Do It:
- Prepare Concrete Top: Clean and seal the concrete if desired.
- Attach Legs: Secure floor flanges to the bottom of the concrete slab, screw pipe legs into flanges.
- Level & Place: Use a level to make sure the table stands evenly.
- Style: Place beside your bed and use for bold, modern style.
Styling Tip:
Pair with metal or leather decor. Add a small industrial lamp or wire basket for an extra touch of city chic.
18. Vintage Drawer Suitcase Stand
Why You’ll Love It:
Combine a single ornate drawer and a classic suitcase stand for a nightstand that oozes vintage charm and offers clever storage.
What You’ll Need:
- 1 decorative or vintage drawer (rescued from an old dresser)
- Foldable suitcase/luggage stand (wood or metal)
- Screws or strong adhesive
- Liner paper (optional)
How To Do It:
- Prep Drawer: Clean and line the inside with pretty paper if you like.
- Secure to Stand: Place the drawer on top of the suitcase stand and secure with screws or heavy-duty glue.
- Style: Place beside your bed and fill the drawer with your bedside essentials.
Styling Tip:
Leave the drawer open to display pretty storage boxes or books, or keep it closed for a neat, elegant look.
19. Hanging Shelf Ladder
Why You’ll Love It:
This playful idea turns a small wooden ladder into a hanging nightstand with multiple shelves—great for books, plants, or even hanging accessories.
What You’ll Need:
- Small wooden ladder (step-stool size or decorative)
- Heavy-duty wall hooks or ceiling hooks
- Rope or sturdy cord
- Drill, screws
How To Do It:
- Prep the Ladder: Sand and paint or stain the ladder if desired.
- Attach Rope: Tie or secure strong rope to the top ends of the ladder.
- Install Hooks: Secure wall or ceiling hooks at the height you want your ladder to hang.
- Hang Ladder: Hang the ladder from the hooks, making sure it’s balanced and secure.
- Style: Place books, plants, or a lamp on the ladder rungs.
Styling Tip:
Wind fairy lights around the ladder for a dreamy bedside glow.
20. Faux Treehouse Stump Table
Why You’ll Love It:
You get the charm of a wood stump nightstand—without the weight! This lightweight version is easy to make and surprisingly sturdy.
What You’ll Need:
- Cardboard boxes or mailing tubes
- Paper mache paste (flour and water or craft glue)
- Brown and gray acrylic paint
- Clear sealer (optional)
- Craft knife, paintbrushes
How To Do It:
- Build Base: Stack and tape cardboard boxes or tubes to the desired height.
- Shape: Use extra cardboard to round the edges and create a stump shape.
- Paper Mache: Cover the stump with 2–3 layers of paper mache, letting each dry.
- Paint: Paint to mimic wood grain and bark. Let dry completely.
- Seal: Optionally add a clear sealer for durability.
Styling Tip:
Top with a wooden tray for drinks and books, or add a faux moss runner for extra woodland vibes.
21. Mirrored Acrylic Cube Nightstand
Why You’ll Love It:
This glamorous nightstand idea adds light and sparkle to your room. Mirrored cubes make small bedrooms feel bigger and more elegant.
What You’ll Need:
- Acrylic mirror sheets or mirrored storage cube
- Strong adhesive (E6000 or similar)
- Measuring tape, craft knife
How To Do It:
- Prep Base: Use a sturdy cube storage box as the base, or build a cube from MDF.
- Cut Mirrors: Cut mirror sheets to fit each side of the cube.
- Attach: Glue mirror sheets to the sides, pressing firmly and letting them dry.
- Finish: Place beside your bed and enjoy the glamorous effect.
Styling Tip:
Pair with metallic or glass accessories, and add a sleek lamp to reflect more light around your space.
22. Old Drum or Tambourine Table
Why You’ll Love It:
Repurposing a drum or tambourine creates a one-of-a-kind boho nightstand that’s full of rhythm and personality. Perfect for musicians or anyone who loves quirky décor.
What You’ll Need:
- Large drum (like a snare, tom, or floor drum) or a big tambourine
- Round wood or glass top (optional, for more surface area)
- Spray paint or wood stain (optional)
- Adhesive pads or rubber feet
How To Do It:
- Prep Drum: Clean thoroughly and remove hardware if desired. Paint or stain for a custom look.
- Add Top (Optional): Rest a round wood or glass piece on top if you want a flat surface.
- Stabilize: Attach adhesive pads or rubber feet to keep the drum steady and protect your floors.
- Style: Place beside your bed and add your favorite nightstand essentials.
Styling Tip:
Top with a music-themed lamp, stack of books, or a small plant for added charm. Looks great in boho, eclectic, or music-inspired bedrooms!
23. Vintage Radio Nightstand
Why You’ll Love It:
Turn a non-working vintage radio into a conversation-starting nightstand that’s packed with nostalgia and charm.
What You’ll Need:
- Old, non-working tabletop radio (thrift stores or flea markets are goldmines)
- Soft cloth, gentle cleaner
- Optional: Small legs or feet (for extra height)
- Optional: Glass or wood top (if the radio isn’t flat)
How To Do It:
- Clean Up: Wipe down and polish the radio. Repair loose parts if needed.
- Add Feet (Optional): Attach small legs to the bottom for height and stability.
- Add Top (Optional): Place a cut-to-size glass or wood piece on top if the radio is curved.
- Style: Set beside your bed and enjoy the retro vibes.
Styling Tip:
Use the inside (if hollow) for extra storage or tuck a small LED light inside for a cozy glow through the radio’s dials and speakers.
Final Thought
A nightstand doesn’t have to be boring—or expensive. With a little creativity and a DIY spirit, you can transform just about anything into a stylish bedside table that matches your personality and needs. Whether you want rustic, modern, vintage, or quirky, these ideas prove your next nightstand is only limited by your imagination. Try one this weekend and give your bedroom a whole new vibe!
FAQ
How do I make a DIY nightstand if I don’t have power tools?
Many of these ideas—like using garden stools, stacking crates or books, or repurposing old objects—require little to no tools. Just look for sturdy items you can stack, paint, or glue together, and focus on easy assembly methods like strong adhesives or ready-made furniture legs.
What’s the cheapest DIY nightstand idea from this list?
Some of the most affordable options are the garden stool nightstand, stacked crates, or a book stack table—especially if you thrift or upcycle materials you already have at home.
Can I make a nightstand that’s easy to move or store away?
Absolutely! Folding TV trays, rolling carts, and wall-mounted folding tray tables are all lightweight and can be stashed away when you need extra space.
Are there pet-friendly nightstand ideas?
Yes—try the pet bed nightstand combo, which gives your furry friend a cozy spot right next to you without taking up extra room.
What’s a good nightstand option for very small bedrooms?
Floating shelves, wall-mounted drawers, and hanging macramé tables are all perfect for small spaces since they free up precious floor area.
Related Articles:
- 19 Cheap DIY Room Divider Ideas That Look Expensive
- 17 Creative DIY Mirror Frame Ideas to Instantly Upgrade Any Space
- DIY Floating Shelves Made Easy: Affordable Builds for Every Skill Level