27 Unique DIY Candle Holder Ideas So Amazing, No One Will Believe You Made Them
Candle holders can completely change the mood of a space, turning simple candles into artistic centerpieces.
And the best part? You can make them yourself, with minimal materials and maximum impact.
This guide walks you through how to create candle holders using natural materials like clay, driftwood, cement, and stone. Each one includes clear steps and supply lists to make it easy to follow, no matter your crafting experience.
Natural Materials with a Glow (Ideas 1–7)
These DIYs rely on organic textures and earthy tones that bring warmth into your space.
1. Air-Dry Clay Sculpted Holders
Materials:
- Air-dry clay
- Rolling pin
- Knife or clay sculpting tools
- Tea light or taper candle
- Matte sealant or Mod Podge
Steps:
- Roll out your clay to about ½ inch thick.
- Cut a circular or abstract shape as the base.
- Press the candle gently into the center to form a snug impression.
- Add extra clay shapes (like rings, beads, or arches) for detail.
- Let dry for 24–48 hours.
- Once dry, seal with a matte finish.
Picture This:
A hand-molded clay candle base in terracotta or cream, sitting on a linen runner beside a crystal and small stack of books.
2. Driftwood Candle Rack
Materials:
- Thick piece of driftwood (12–18 inches long)
- Tea lights or taper candles
- Drill with a spade bit
- Sandpaper
- Wood sealer (optional)
Steps:
- Clean and dry your driftwood.
- Use the drill to create holes across the top, deep enough to hold candles.
- Sand down any rough edges.
- Wipe clean and seal if desired.
- Insert your candles and display.
Safety Tip:
Ensure the candles sit securely and keep them away from fabric or flammable materials.
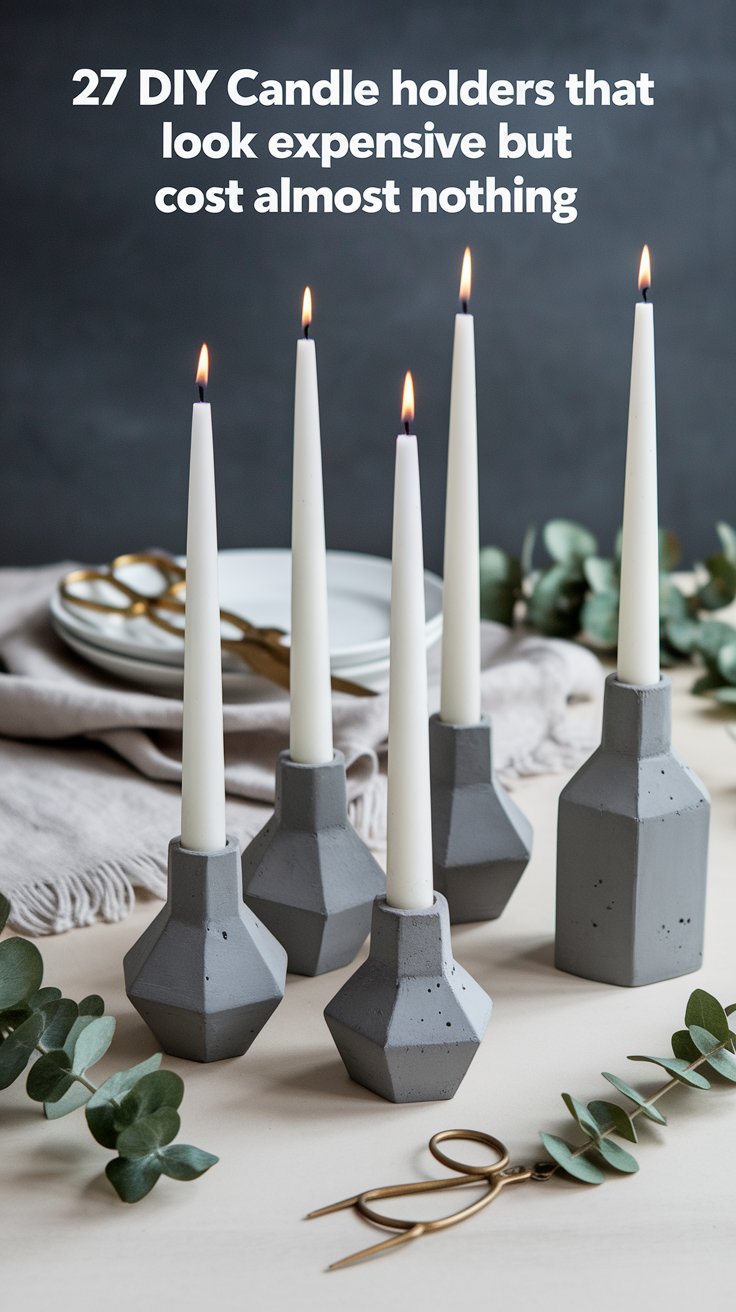
3. Cement Candle Blocks
Materials:
- Quick-set cement
- Silicone mold (ice cube tray or baking mold)
- Water
- Stir stick and container
- Tea light cups or taper bases
Steps:
- Mix cement and water following package instructions.
- Pour into silicone molds.
- Before it sets fully, press a metal tealight cup or taper base into the center.
- Let dry completely (usually 24 hours).
- Pop out and sand edges if needed.
| Cement Style | Best Molds to Use |
|---|---|
| Industrial | Square or geometric tray |
| Organic | Round or imperfect forms |
4. Himalayan Salt Tealight Bowl
Materials:
- Large chunk of Himalayan salt
- Spoon, chisel, or Dremel tool
- Tea light
- Felt pads (optional, for the base)
Steps:
- Hollow out the center of the salt rock using your tool.
- Make the well deep enough to hold a tealight safely.
- Clean out dust and place candle inside.
- Optional: Add felt pads to the bottom to protect surfaces.
The soft pink glow is perfect for calming spaces like bedrooms or meditation corners.
5. Sand and Glue Molded Pillar Holders
Materials:
- Fine sand (playground or craft)
- White glue (like Elmer’s)
- Water
- Small glass jar or cylinder
- Mixing bowl
Steps:
- Mix sand and glue in a bowl (about 2 parts sand to 1 part glue).
- Add a bit of water if needed for spreadability.
- Press the mixture around the outside of the glass.
- Shape and smooth using wet fingers.
- Let dry completely.
This creates a beachy, stone-textured look around any candle.
6. Stacked Stone Votive Holders
Materials:
- Flat river stones
- Hot glue gun or strong adhesive
- Tea lights
- Optional: tray or wood slice for display
Steps:
- Sort stones by size and shape.
- Stack them to form a mini tower, gluing as you go.
- Leave a slight dip at the top to fit a tea light securely.
- Place on a tray with greenery or moss for a natural vibe.
7. Shell and Coral Dish Candles
Materials:
- Large seashells or coral pieces
- Tea lights or candle wax + wick
- Hot glue (if needed for balance)
- Optional: decorative sand or small tray
Steps:
- Clean the shell or coral.
- If using pre-made candles, insert them inside.
- If pouring wax:
- Melt candle wax and pour into the shell
- Hold the wick in place until it sets
- Secure the base with glue if the shell tips easily.
- Display on a tray with sand or tiny shells.
Rustic + Earthy DIYs (Ideas 8–13)
These candle holders lean into warmth, wood, and cozy texture. They’re perfect for fall decor, farmhouse spaces, or any home that needs a handmade touch.
8. Twine-Wrapped Mason Jars
Materials:
- Mason jars (any size)
- Jute twine or natural string
- Hot glue gun
- Tea lights or fairy lights
Steps:
- Apply a small dot of hot glue near the base of the jar.
- Begin wrapping the twine tightly around the jar.
- Add glue every few inches to keep it secure.
- Stop at the top or leave the neck of the jar exposed.
- Drop in a candle or string of lights.
Style Tip: Tie a small charm or dried flower to the neck for added personality.
9. Wooden Log Tea Light Trough
Materials:
- Small hardwood log (about 3–4 inches thick)
- Drill with a spade bit
- Sandpaper
- Tea lights
Steps:
- Cut the log to the length you want.
- Drill evenly spaced holes across the top, just deep enough for tea lights.
- Sand down the edges and surface.
- Optionally treat the wood with beeswax or mineral oil.
- Insert tea lights and display on a table or mantel.
This is a fantastic centerpiece for fall or holiday tables.
10. Birch Bark Candle Sleeves
Materials:
- Sheets of birch bark (real or faux)
- Glass votive holders
- Hot glue gun or craft adhesive
- Twine or leather cord (optional)
Steps:
- Measure and cut the birch bark to wrap around your glass holder.
- Glue it in place with the seam at the back.
- Tie twine or cord around the middle for texture.
- Add a tea light inside.
These look stunning grouped in threes or paired with pinecones for winter.
11. Terracotta Stacked Plate Holders
Materials:
- Small terracotta pots and saucers (various sizes)
- E6000 glue or strong craft adhesive
- Acrylic paint (optional)
- Taper or pillar candles
Steps:
- Stack a small saucer on top of an inverted pot using glue.
- Let dry fully (about 24 hours).
- Paint with soft matte tones or leave natural.
- Place candles in the center of the saucers.
Variation: Add moss or gravel around the candle base for extra flair.
12. Upcycled Spice Jar Candlesticks
Materials:
- Empty glass spice jars
- Paint (spray or chalk)
- Taper candles
- Floral foam or melted wax for securing
Steps:
- Clean the jars and remove labels.
- Paint them if desired and let dry.
- Place a small piece of floral foam or wax inside to hold the candle upright.
- Insert taper and adjust for balance.
These are perfect for clustered displays on window ledges or tables.
13. Rattan-Wrapped Glass Vases
Materials:
- Small clear glass vases or jars
- Flat rattan peel, cane webbing, or raffia
- Hot glue gun
- Tea lights
Steps:
- Cut your wrapping material to fit around the vase.
- Glue one edge to the glass and wrap snugly around.
- Secure the end with a final bead of glue.
- Insert a tea light and place on a shelf or tray.
Optional: Mix with boho elements like feathers, crystals, or dried flowers.
Glass, Mirror, and Shine (Ideas 14–18)
These candle holders reflect light in the most beautiful ways, adding sparkle and polish to your handmade decor.
14. Faux Mercury Glass Votives
Materials:
- Clear glass votive holders or jars
- Looking glass spray paint
- Water in spray bottle
- Paper towels
Steps:
- Lightly mist the inside of each glass holder with water.
- Quickly spray with looking glass paint while water droplets are still present.
- Let dry for 5 minutes, then dab with paper towel for texture.
- Repeat 2–3 times for full effect.
- Add tea lights inside for a vintage glow.
These look high-end and are perfect for dinner parties or holiday displays.
15. Stained Glass Mosaic Votives
Materials:
- Clear glass votives
- Small pieces of colored glass or iridescent tile
- Glass glue or Mod Podge
- Grout (optional for fuller finish)
Steps:
- Apply small dabs of glue and attach glass pieces one by one.
- Cover the surface with spaced tiles or fill it entirely.
- Let dry, then apply grout if desired.
- Wipe off excess and polish the glass.
- Insert tea lights.
Style Tip: Stick to a cohesive color palette for a more elevated look.
16. Mirror Tile Cube Holders
Materials:
- Small wooden blocks or cardboard boxes
- Mirror mosaic tiles (peel-and-stick or glued)
- Hot glue gun or adhesive
- Votive candles
Steps:
- Cover the sides of your cube with mirror tiles, cutting as needed.
- Secure with adhesive or hot glue.
- Place a tea light on top or carve out a cavity in the center for a votive.
- Style alone or in sets of three.
These bounce light around beautifully and add instant glam to any surface.
17. Glass Bottle Taper Holders
Materials:
- Vintage or recycled glass bottles (wine, soda, oil)
- Taper candles
- Optional: paint or rope for embellishment
Steps:
- Clean and dry the bottles.
- Insert taper candles directly into the neck.
- Drip wax around the opening for an old-world touch, or keep clean for modern look.
- Arrange in groups of varying heights.
Use colored glass for added dimension, especially greens, ambers, and blues.
18. Glitter-Dipped Tumblers
Materials:
- Small glass tumblers or jars
- Mod Podge
- Fine glitter
- Painter’s tape
- Foam brush
Steps:
- Use tape to mark off a straight line for your glitter dip.
- Apply Mod Podge below the tape with the foam brush.
- Sprinkle glitter evenly and let dry.
- Remove tape and seal with another layer of Mod Podge.
- Place a tea light inside.
These work well as party decor or festive shelf accents.
Whimsical and Unexpected (Ideas 19–22)
These offbeat ideas are made to surprise. They turn everyday or forgotten items into beautiful candle holders that spark conversation.
19. Gold Pasta Candle Holders
Materials:
- Dry pasta (rigatoni, penne, farfalle, etc.)
- Cardboard or wood base
- Hot glue gun
- Gold spray paint
- Tea lights or tapers
Steps:
- Use hot glue to attach pasta vertically or in a pattern on your base.
- Leave a cavity or opening for your candle in the center.
- Spray the entire piece gold once it’s dry.
- Let dry completely and place your candle in the opening.
Note: For a sturdier version, reinforce the inside with foil or a glass cup before adding a real candle.
20. Vintage Spoon Tealight Tree
Materials:
- Old or mismatched metal spoons
- Small wooden plank or driftwood base
- Nails or heavy-duty glue
- Tea lights
Steps:
- Flatten spoon bowls slightly using a mallet (optional).
- Bend handles to form angles.
- Attach each spoon to the base in a tree-like pattern.
- Rest tea lights inside each spoon bowl.
This makes a great rustic gift or seasonal accent.
21. Crystal Cluster Candle Bases
Materials:
- Small crystals or tumbled stones
- Strong adhesive (like E6000)
- Glass candle plate or wood base
- Pillar or jar candles
Steps:
- Arrange your crystals around the base or edge of a glass plate.
- Glue them in place tightly together.
- Let cure for at least 24 hours.
- Center your candle and enjoy the sparkle.
Great for: Meditation spaces, bedside tables, or gifting.
22. Painted Ceramic Animal Stands
Materials:
- Small ceramic animals (from dollar stores or thrift shops)
- Spray paint or acrylic paint
- Small dish or glass votive holder
- Epoxy glue
Steps:
- Paint your ceramic animal in matte white, black, gold, or blush.
- Let it dry completely.
- Glue a small dish or votive holder onto the animal’s back.
- Use for tea lights or as incense holders.
Ideas to try: Elephants, birds, bunnies, or even dinosaurs for playful contrast.
Minimal and Modern DIYs (Ideas 23–27)
These candle holders prove you don’t need a lot of detail to make a big impact. Use this section for inspiration if you love sleek, high-contrast, and statement-worthy pieces that still feel handmade.
23. Concrete and Copper Pipe Holders
Materials:
- Quick-set concrete
- Small paper cups or silicone molds
- ½ inch copper pipe (cut into 2–3 inch segments)
- Candle wax or taper candle base
Steps:
- Fill each mold with mixed concrete.
- Press the copper pipe segment vertically into the center while wet.
- Let dry fully before unmolding.
- Sand edges if needed.
These work best for taper candles and look great in groups of 3 or 5.
24. Geometric Clay Block Holders
Materials:
- Oven-bake or air-dry clay
- Knife or sculpting tools
- Acrylic paint or sealant
- Taper candle
Steps:
- Shape clay into cubes, arches, or triangular prisms.
- Use a candle or dowel to poke a centered hole for taper base.
- Let dry fully (air-dry or bake as needed).
- Paint in matte neutral tones or bold solids.
These are ultra-customizable and ideal for modern shelf styling.
25. Whitewashed Wooden Cubes
Materials:
- Wooden blocks (2–4 inches)
- White paint + water (for wash effect)
- Drill with spade bit
- Sandpaper
- Tea lights or tapers
Steps:
- Drill a shallow hole on top of each block.
- Mix paint with water for a whitewash.
- Apply paint and wipe excess for a faded look.
- Insert candles and group on trays or windowsills.
This is a great beginner woodworking project with a crisp, clean finish.
26. Clear Acrylic Cylinder Votives
Materials:
- Clear acrylic tubing (cut to 4–6 inch segments)
- Adhesive or epoxy
- Round base (wood, marble, or plastic)
- Tea lights
Steps:
- Cut acrylic tubing to desired height.
- Secure each cylinder to its base with clear epoxy.
- Let dry fully and insert a tea light or LED.
These have a high-end store look and are ideal for minimalist interiors.
27. Matte Black Sculpted Holders
Materials:
- Air-dry clay or plaster
- Sculpting tools or hands
- Matte black spray paint
- Taper candles
Steps:
- Sculpt bold, irregular forms from clay, blocks, loops, arches, or pillars.
- Let dry and sand smooth.
- Spray with matte black paint and let cure.
- Add taper candle and display against lighter backgrounds for contrast.
These are statement-making and pair beautifully with neutrals, metallics, or stone.
Final Thought
Candle holders are more than just functional, they’re an opportunity to express your creativity and style. Whether you love natural textures, modern lines, or whimsical pieces, the right DIY candle holder can transform any surface into a warm and inviting focal point.
Most of these projects take just a few materials and a little time. The magic is in how you style them. Mix materials like clay and glass, group holders in odd numbers, or pair them with greenery, crystals, or books. You’ll be amazed at how much ambiance you can create with your own two hands.
Try one or two ideas to start, and let your style evolve from there. Handmade touches make your home feel more personal, more beautiful, and yes, more expensive-looking too.
FAQs
What type of candles work best for these DIY holders?
Tea lights and taper candles are the most versatile. Use tealights for low-profile holders and tapers for height. Make sure your holders are stable and sized correctly to prevent tipping or overheating.
Are homemade candle holders safe to use with real flames?
Yes, as long as you use heat-safe materials and avoid flammable embellishments. Always supervise lit candles and keep them away from curtains, paper, and children.
How do I make candle holders look professionally made?
Stick with a cohesive color palette, use matte finishes, and focus on clean lines. Neutrals, gold accents, and natural textures help make your DIYs feel upscale.
Can I make these as gifts?
Absolutely. Many of these holders, like the stacked stones, clay bases, and mercury glass, make thoughtful, personal gifts. Wrap them with ribbon and pair with a nice candle or matches.
What’s a good way to display multiple candle holders together?
Use a tray or wood slice as a base. Combine holders of different heights and textures, and group them in odd numbers (3 or 5 works well). Add a few natural elements like dried flowers or crystals to complete the look.
Related Articles:
- 19 Cheap DIY Room Divider Ideas That Look Expensive
- DIY Floating Shelves Made Easy: Affordable Builds for Every Skill Level
- 31 Easy DIY Fall Decor Projects That Look Super Expensive